Part 1 - Techlao End User App Installation and Initial Account Sign Up

  1. Go to Google Play Store or Apple App Store

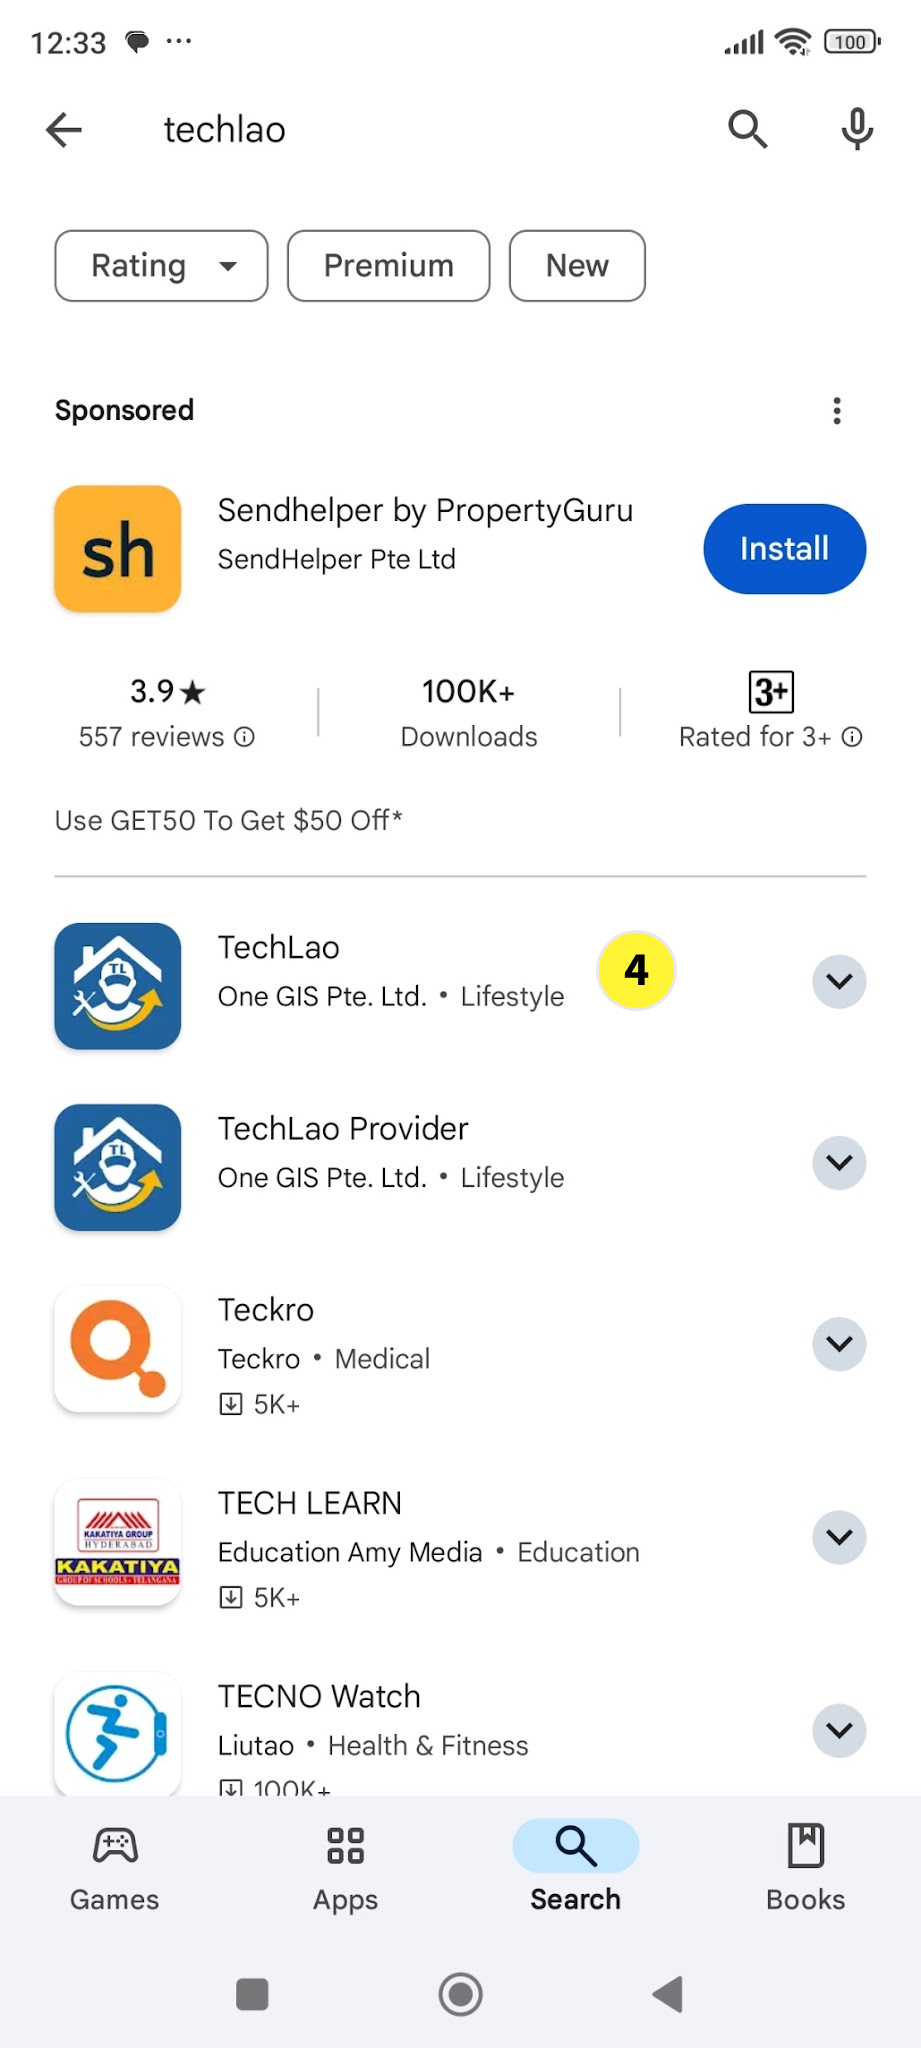
  2. Type in TechLao in the search menu

  3. Do not select the TechLao Provider App if you are not a service provider

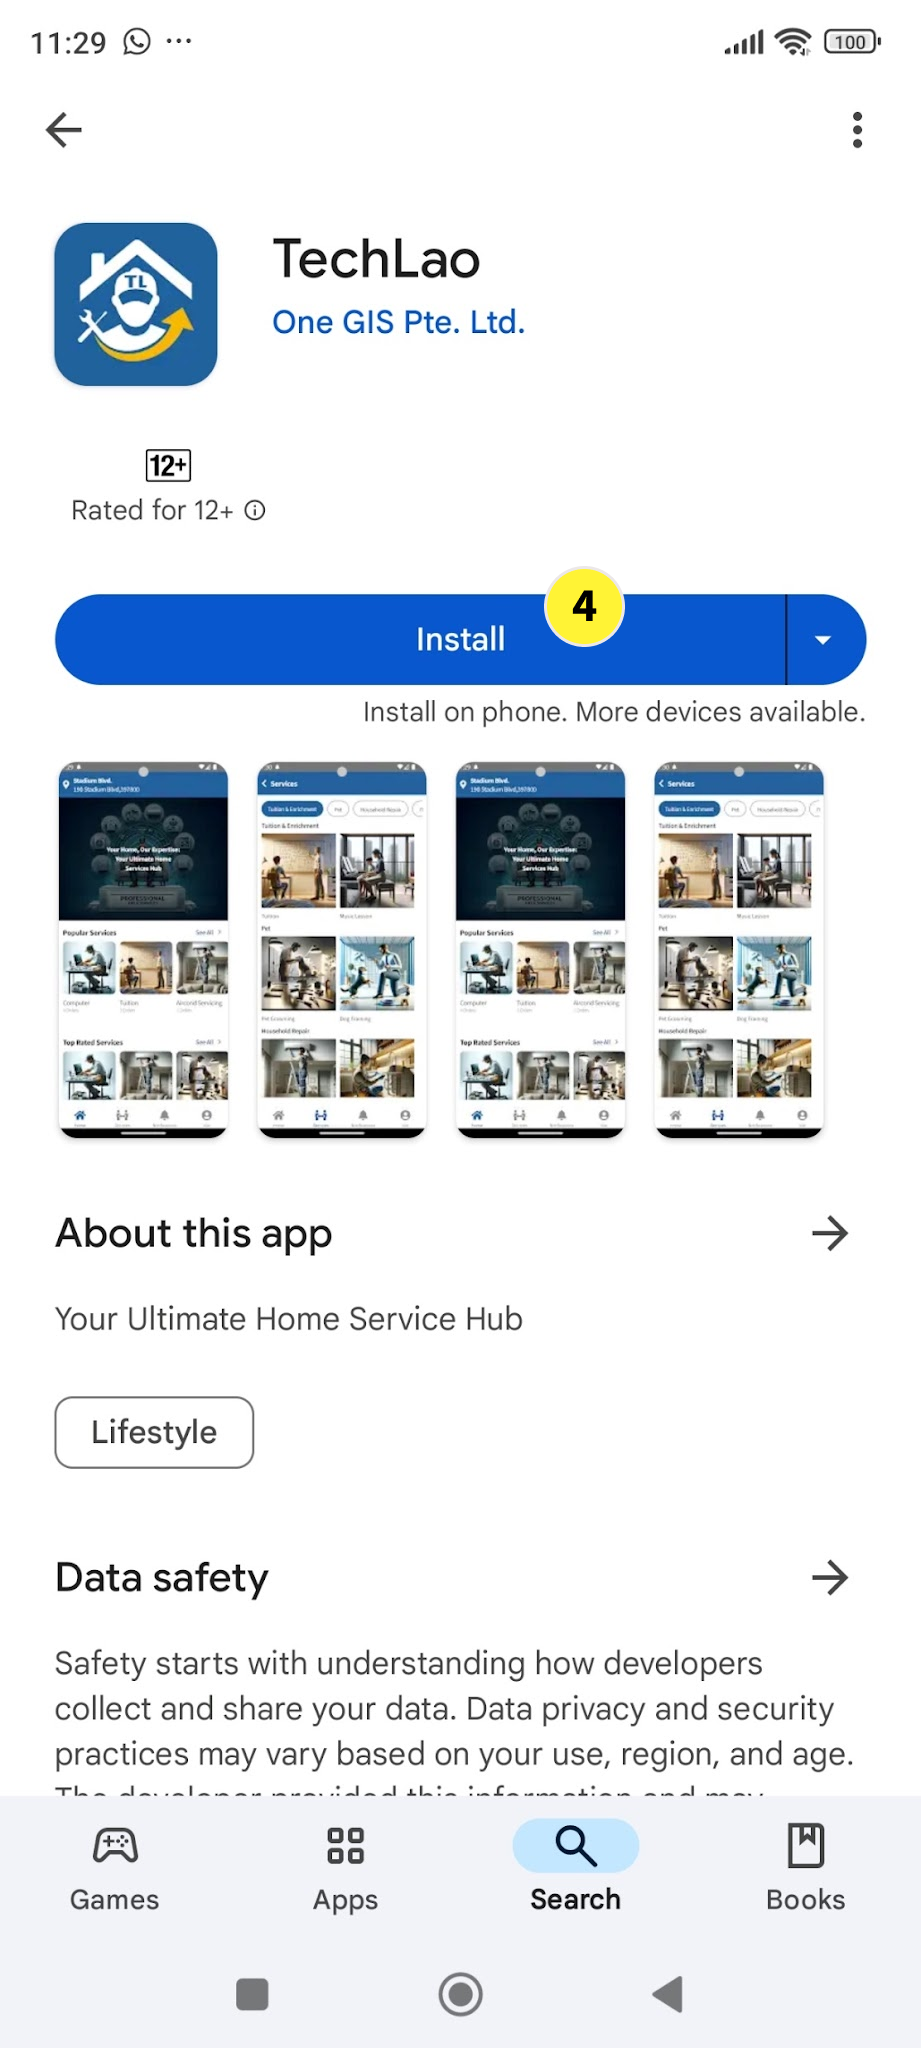
  4. Select the Tech Lao App for End User and tap on install


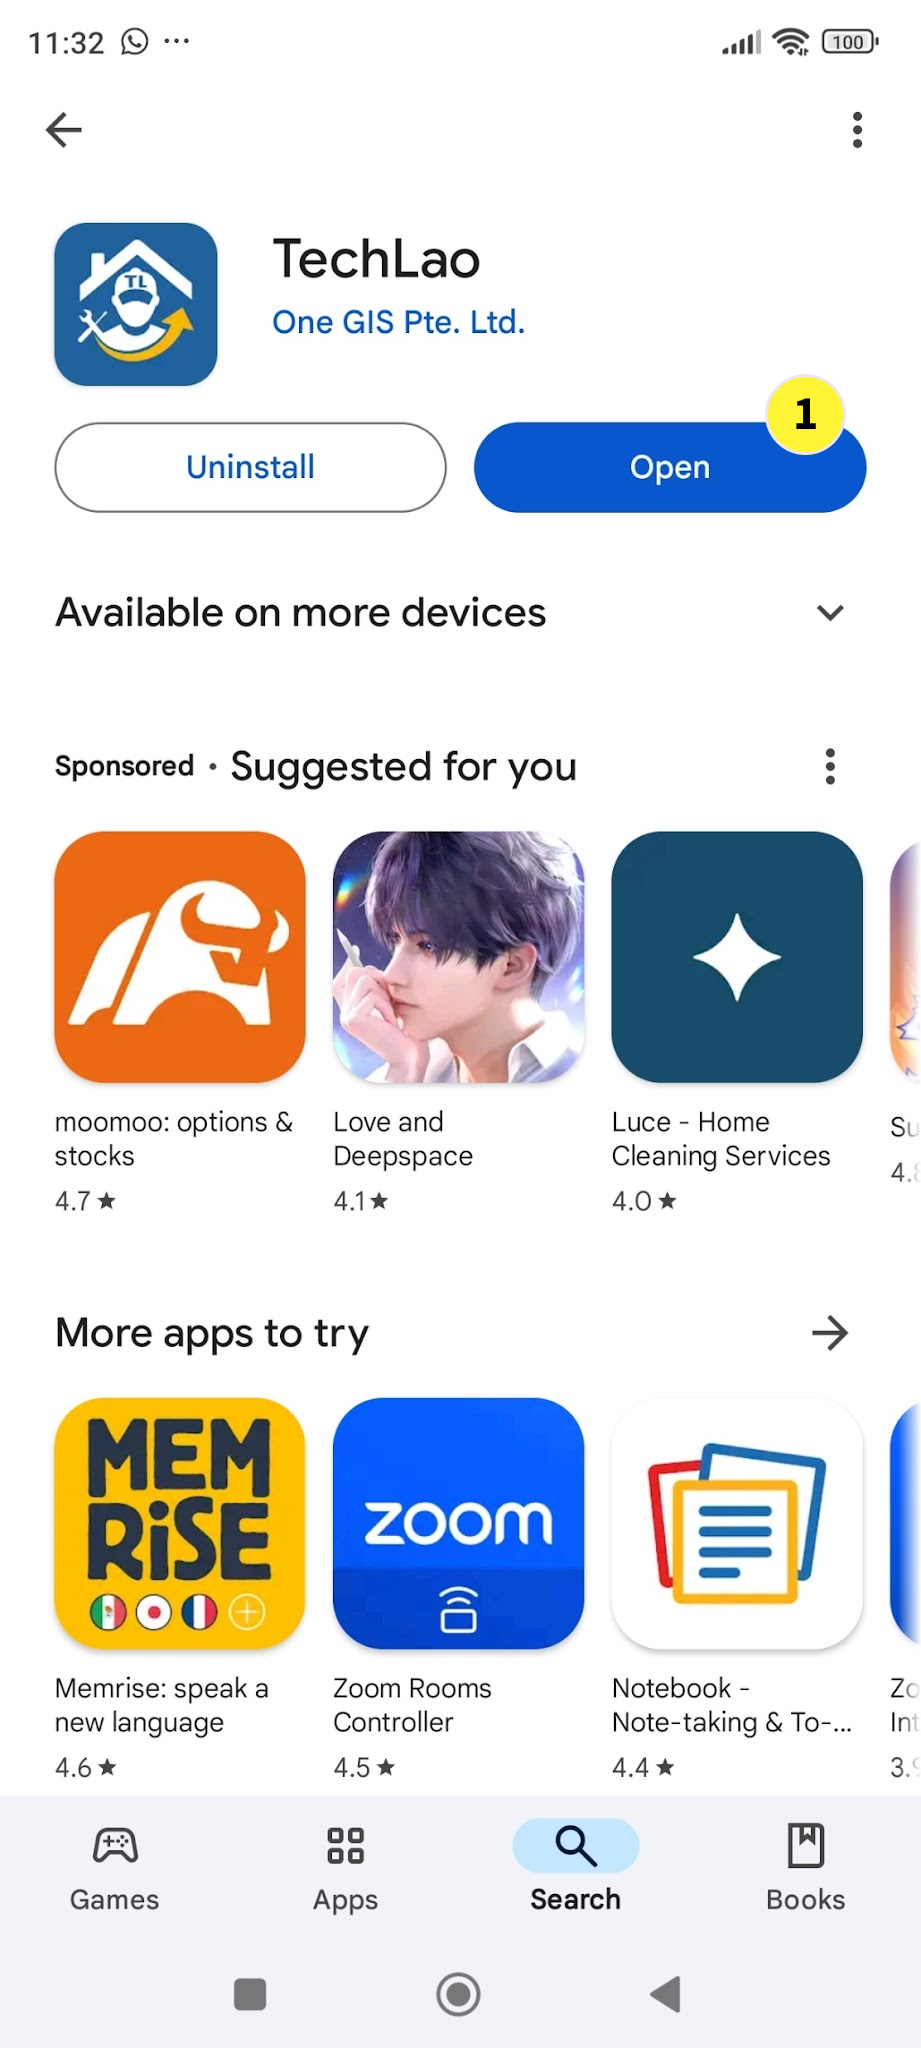
  1. When the end user App is installed, you can tap on Open when you are still within the Play Store environment.

  2. Alternatively, you can exit the Play Store and search for the Techlao icon in your home screen


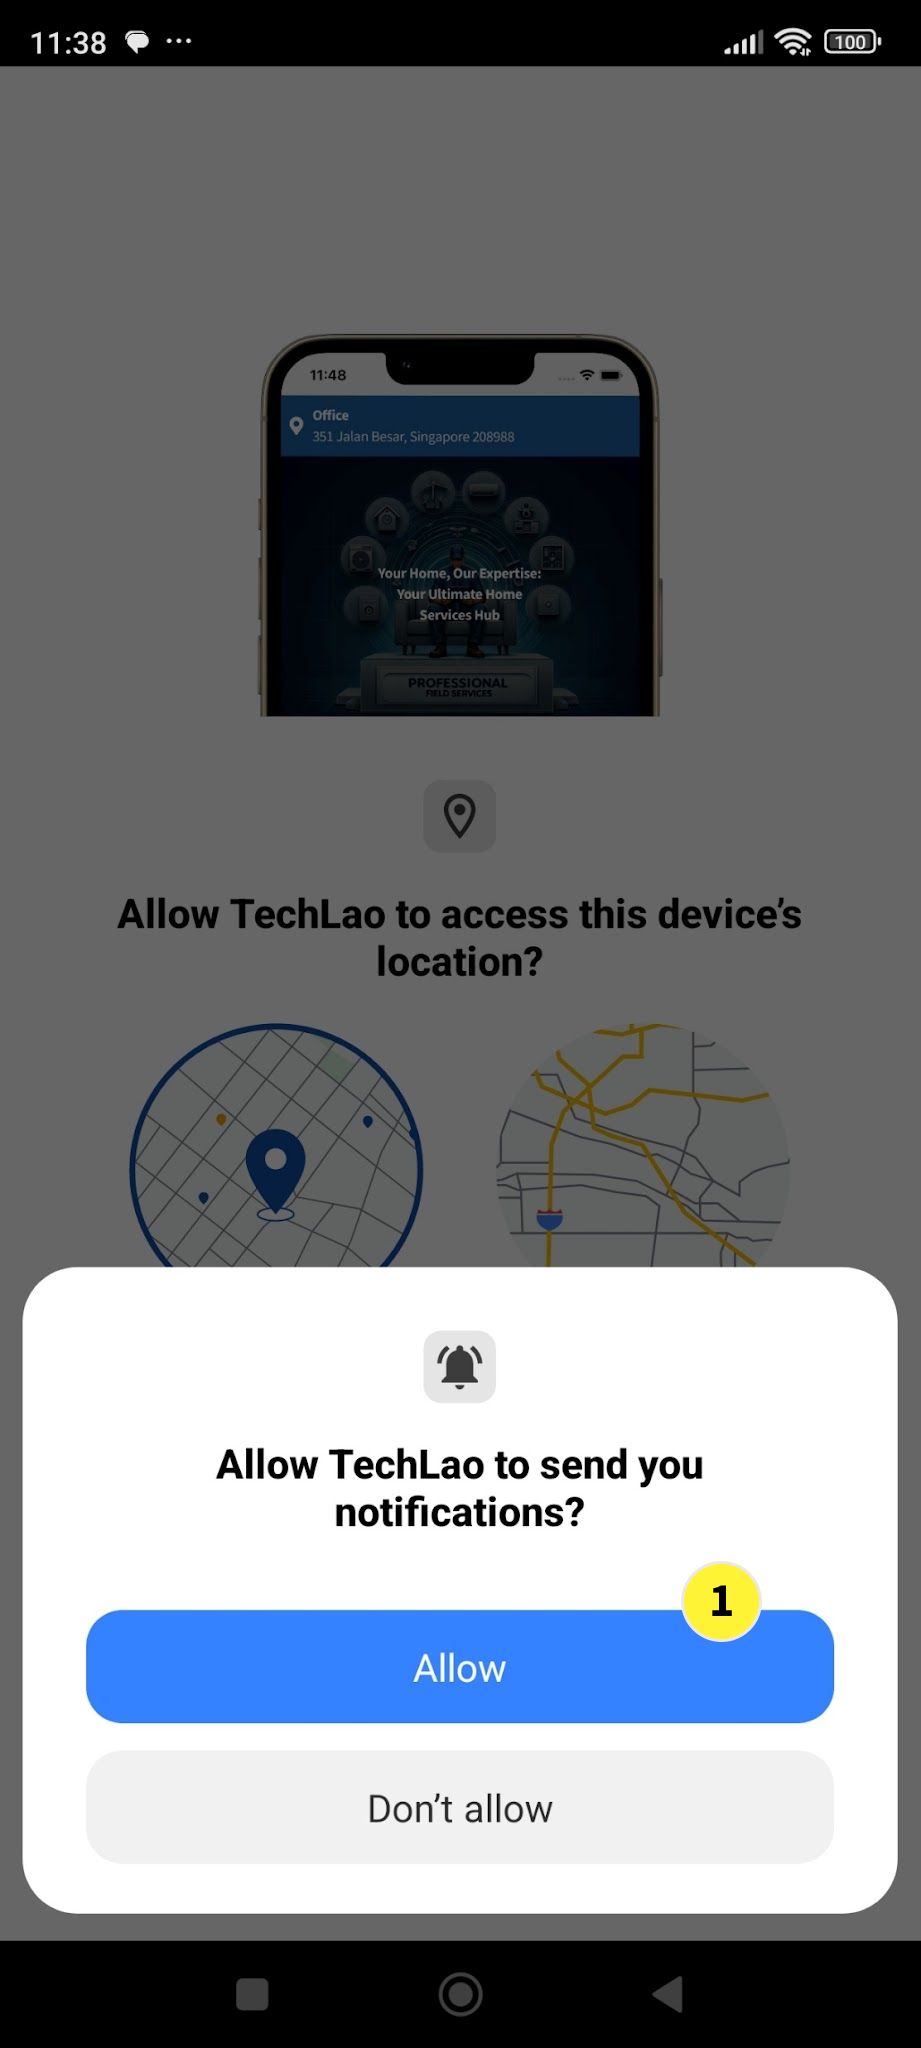
  1. If it is the first time you are opening the end user App, it will prompt you to select your choice for Send Notification We recommend that you select Allow

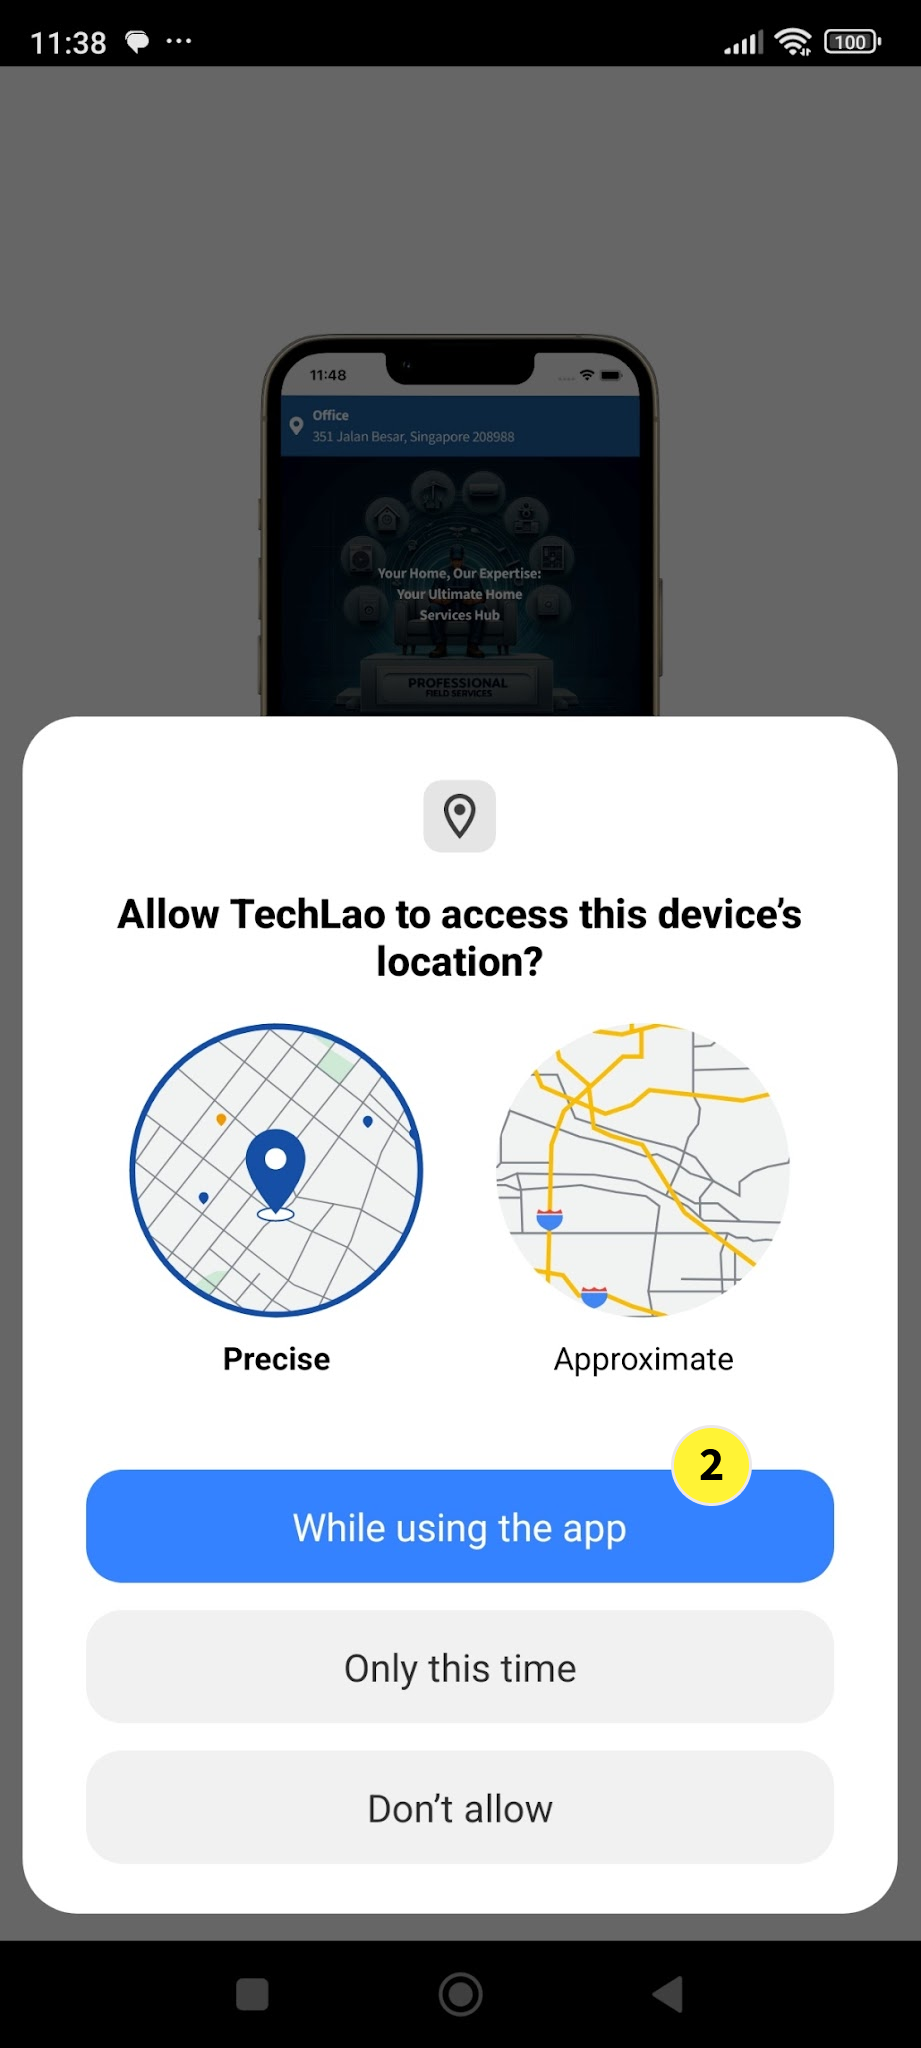
  2. The next is to select your choice on Access Device Location. We recommend that you select While using the app


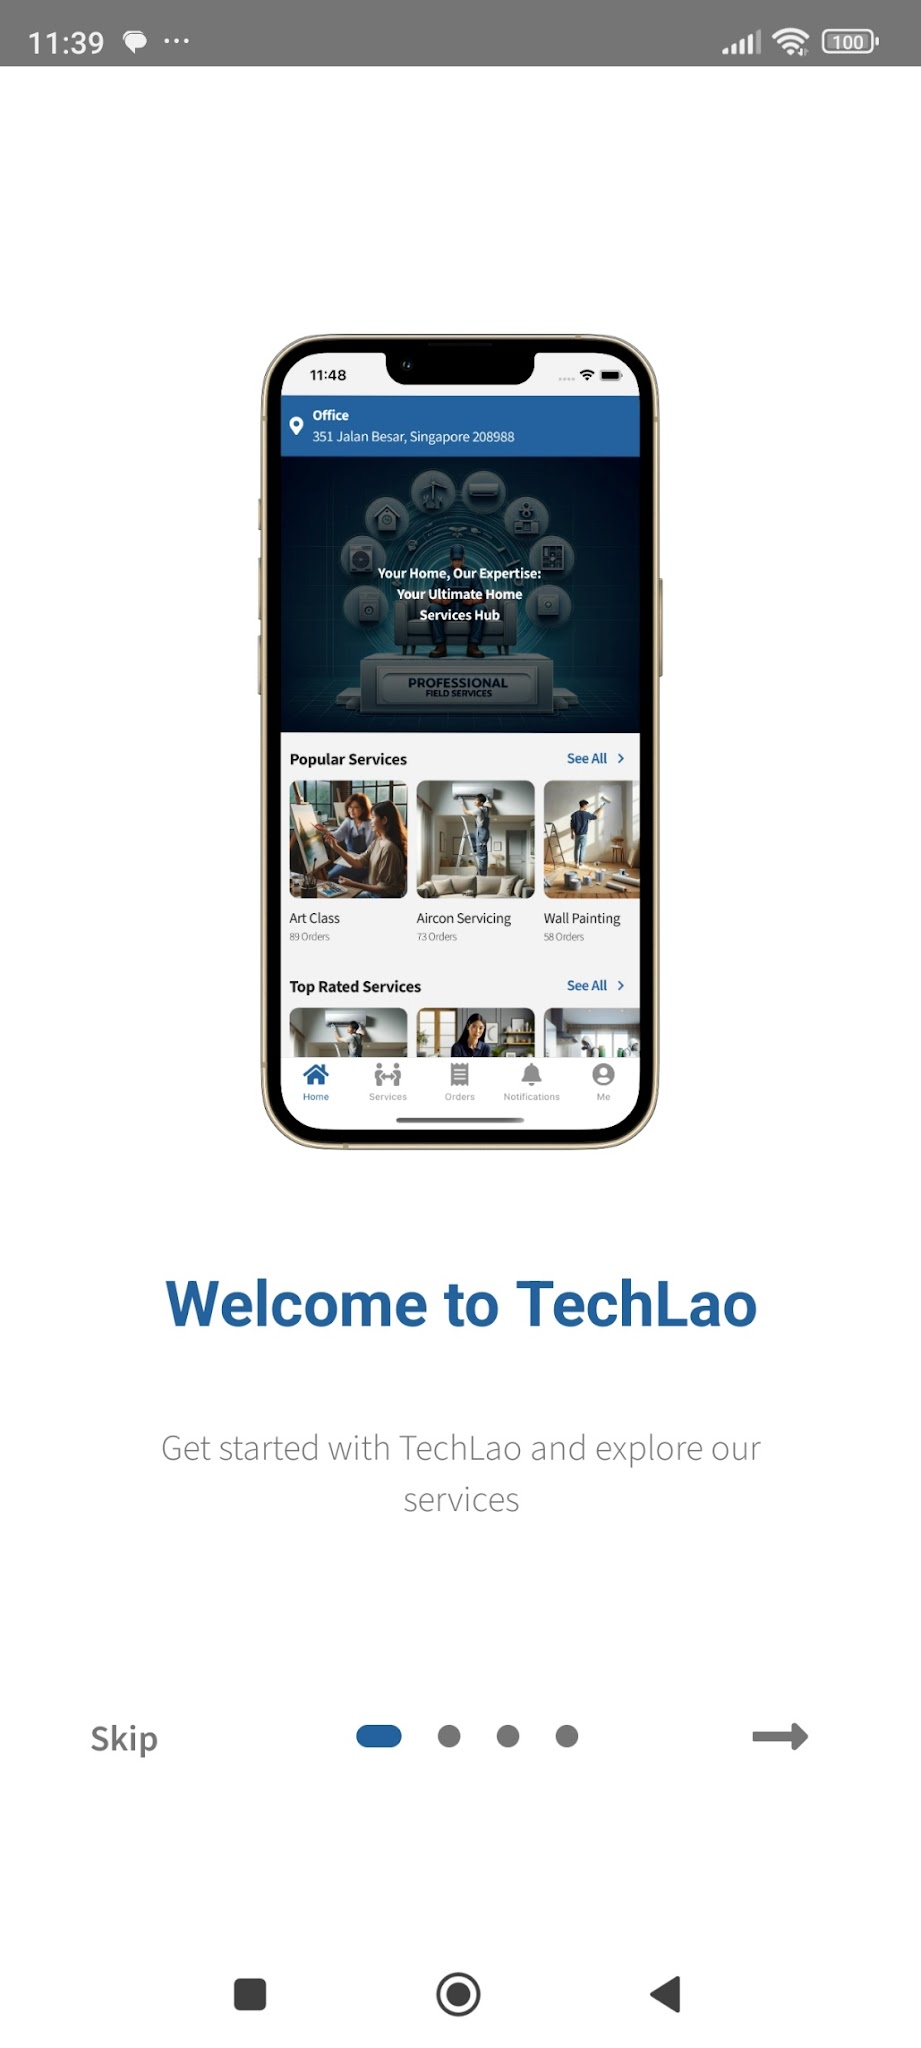
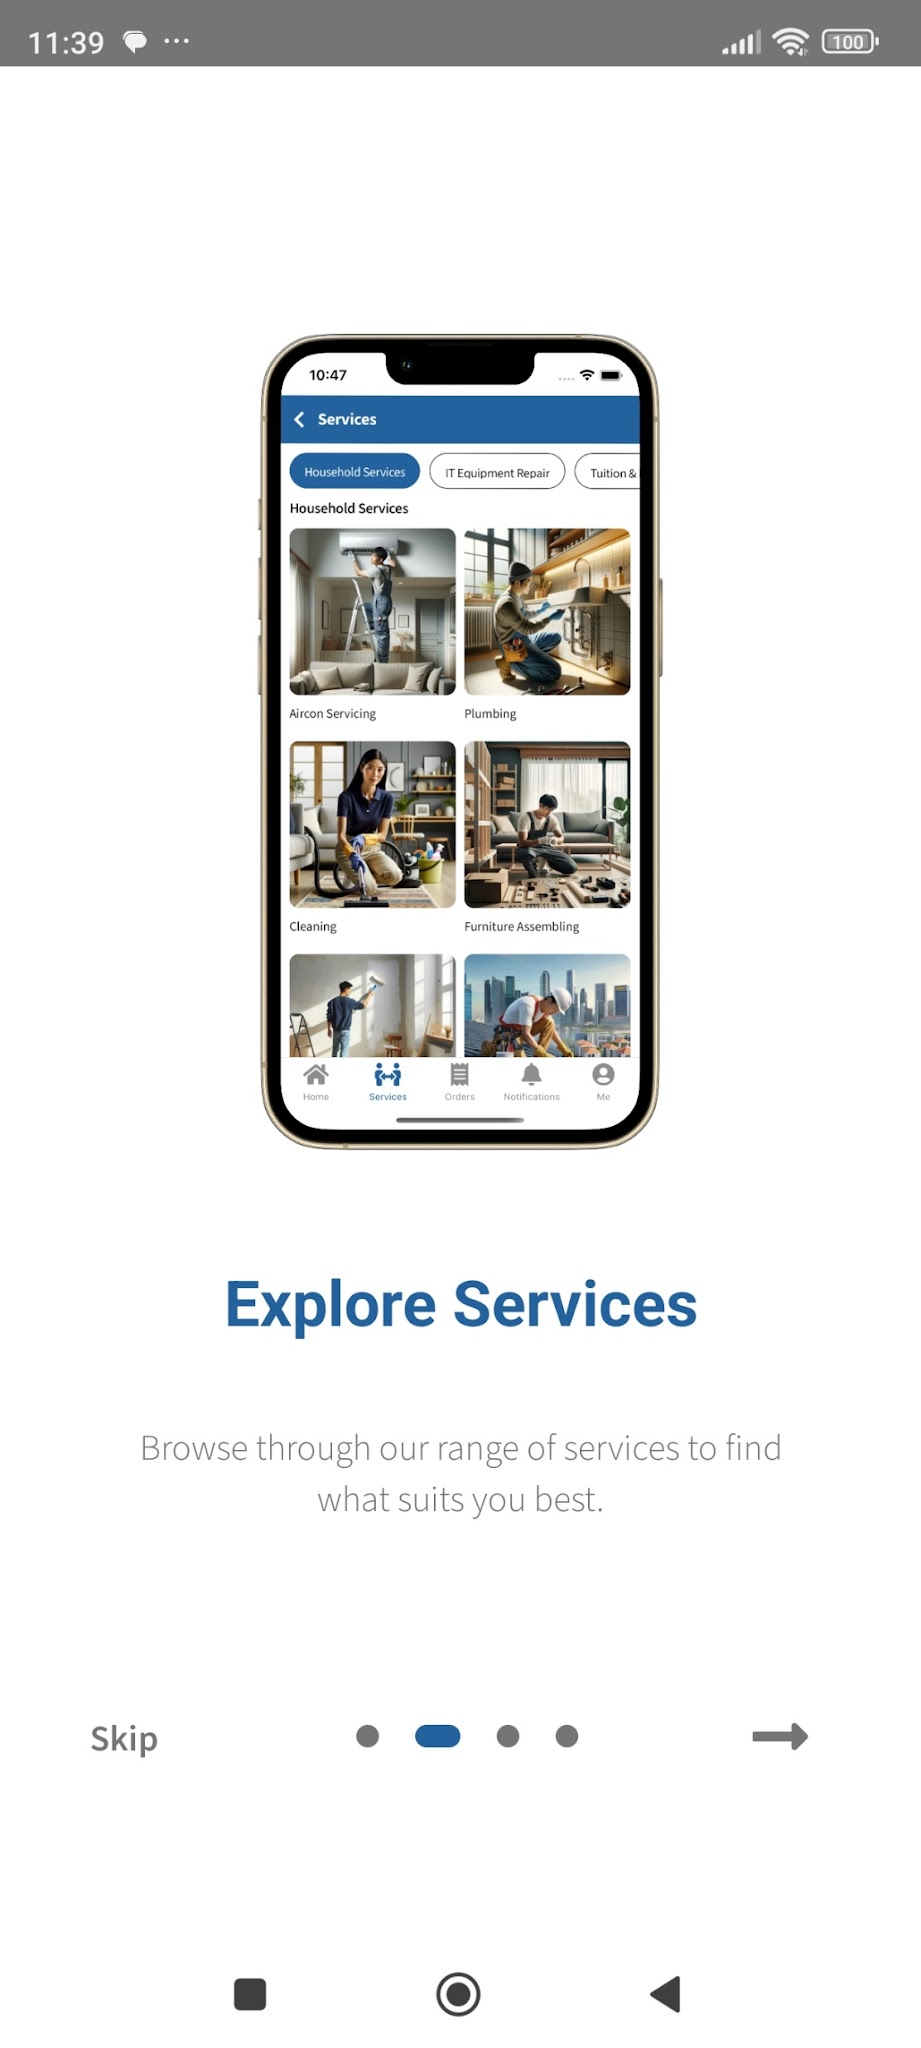
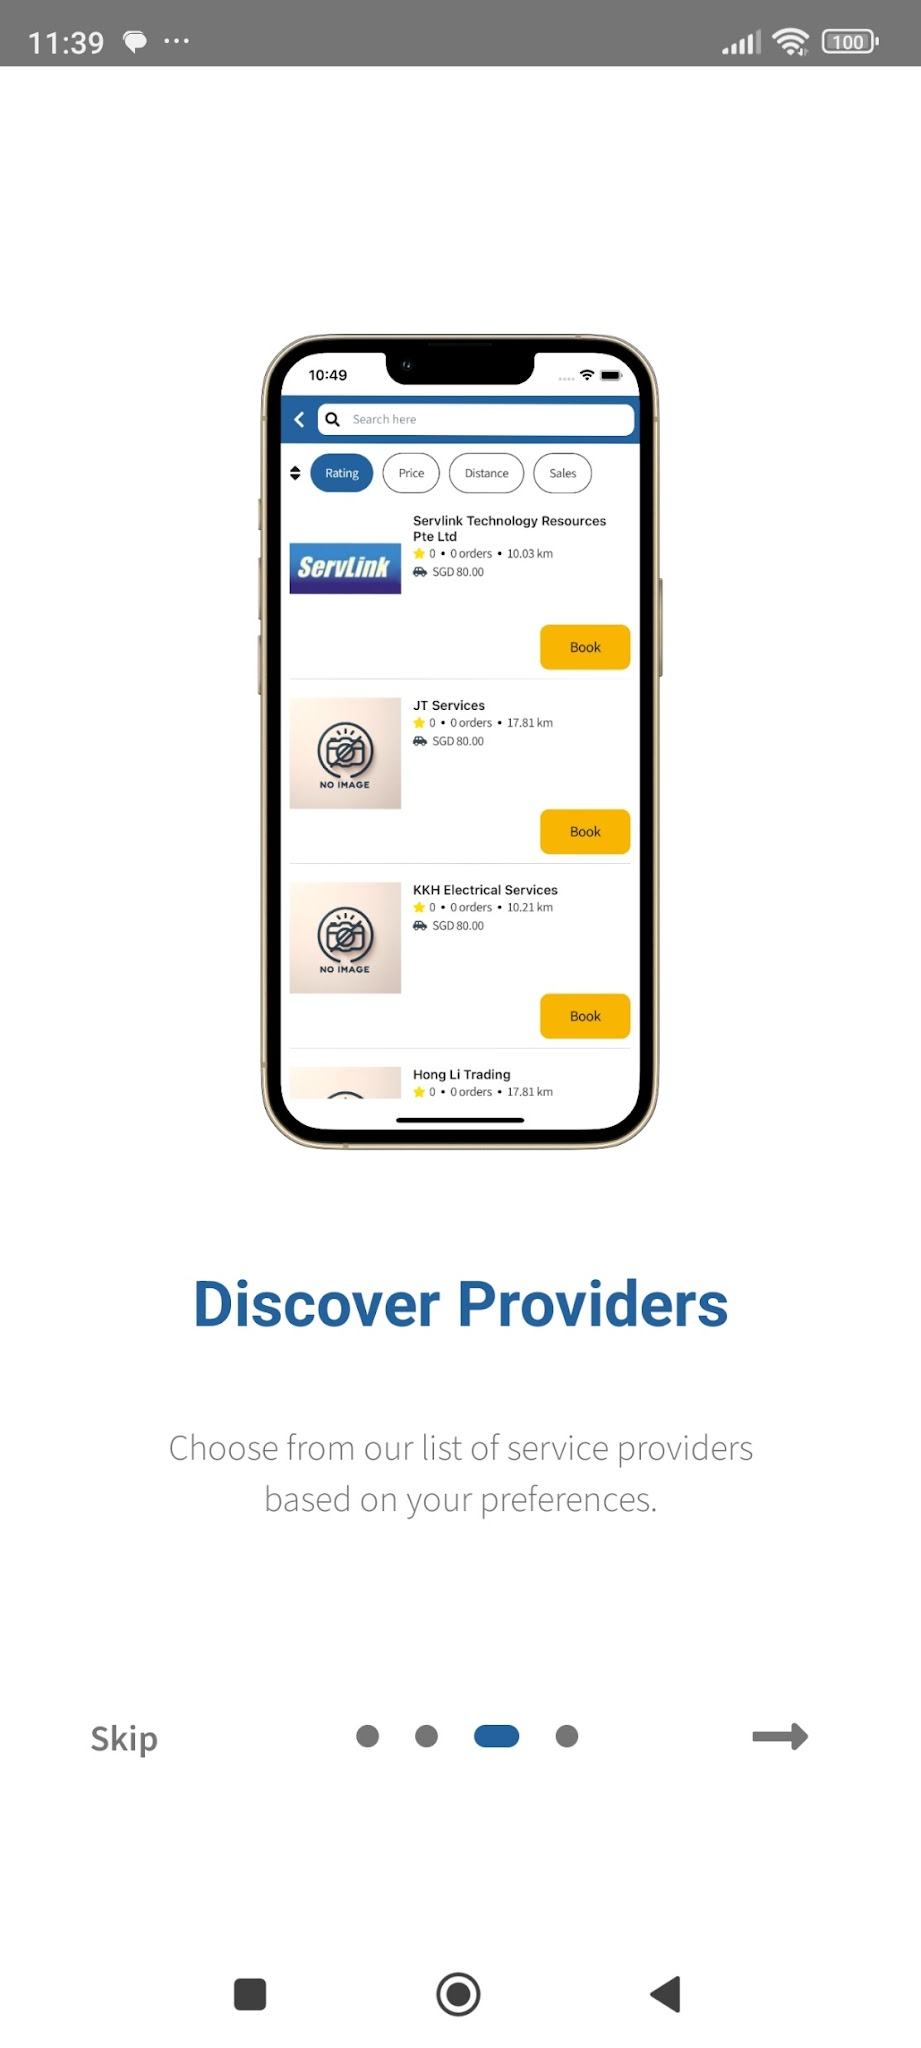
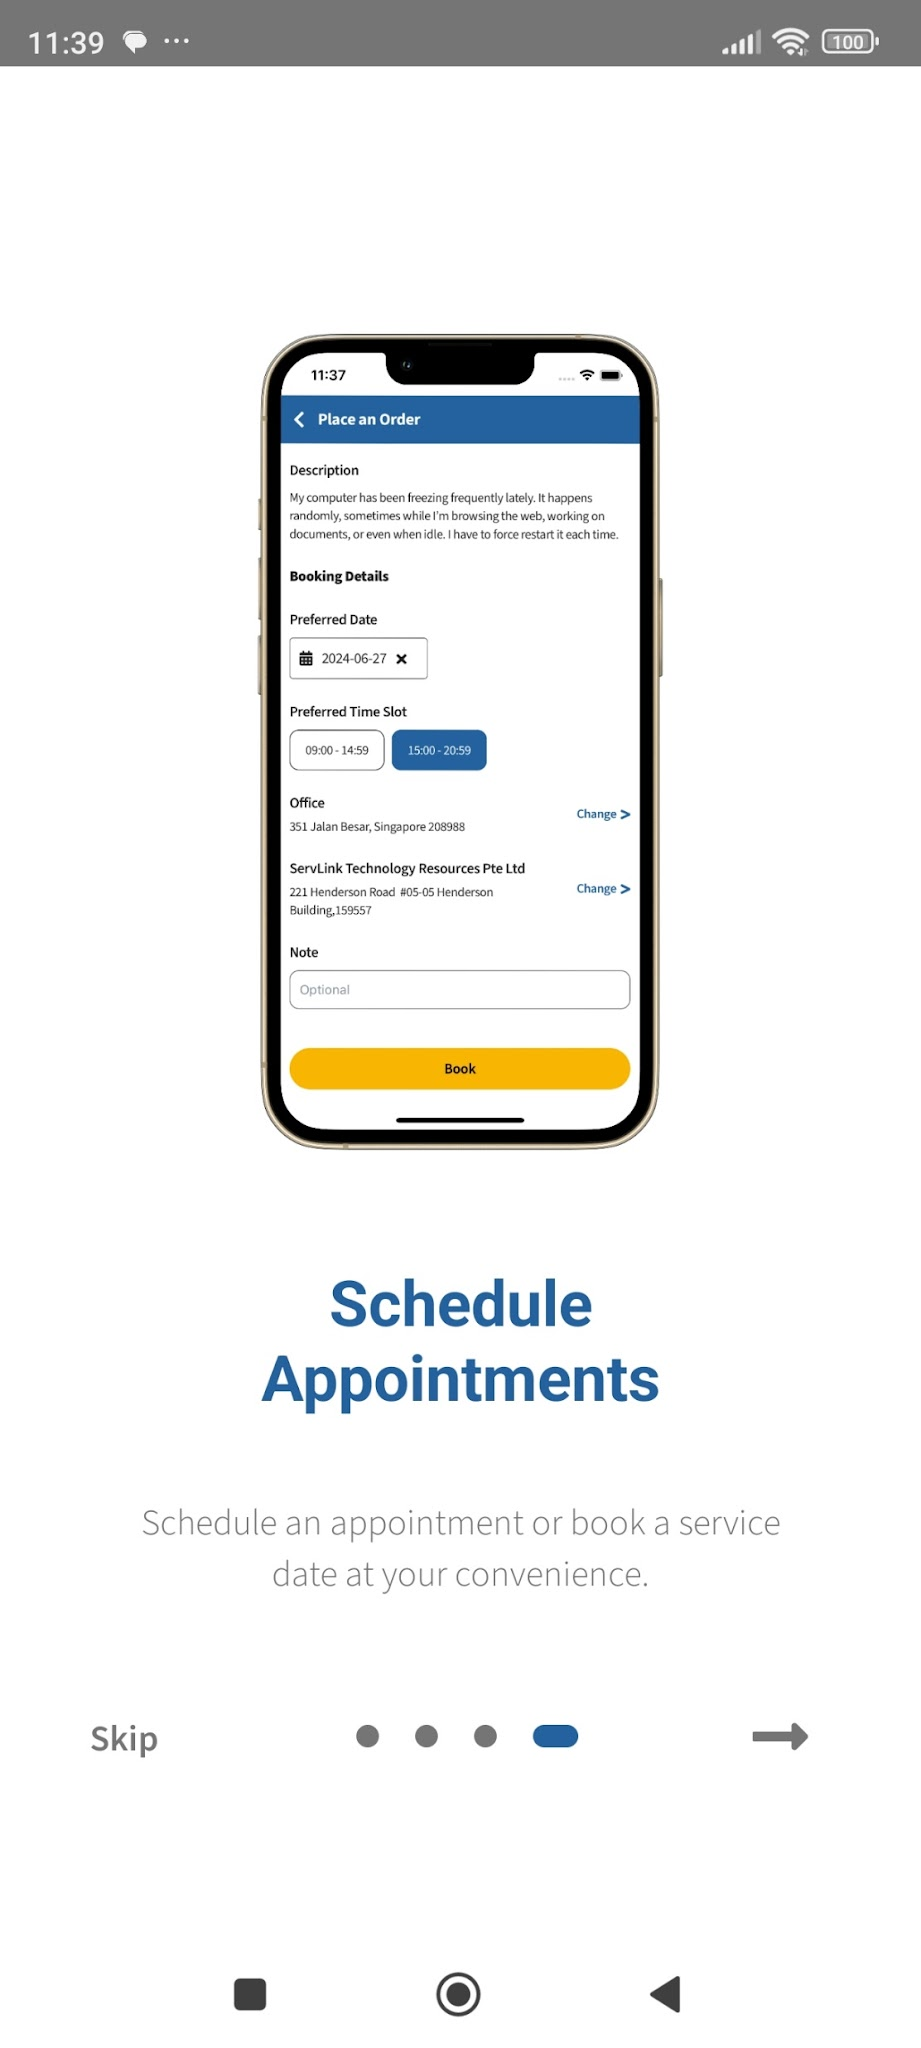
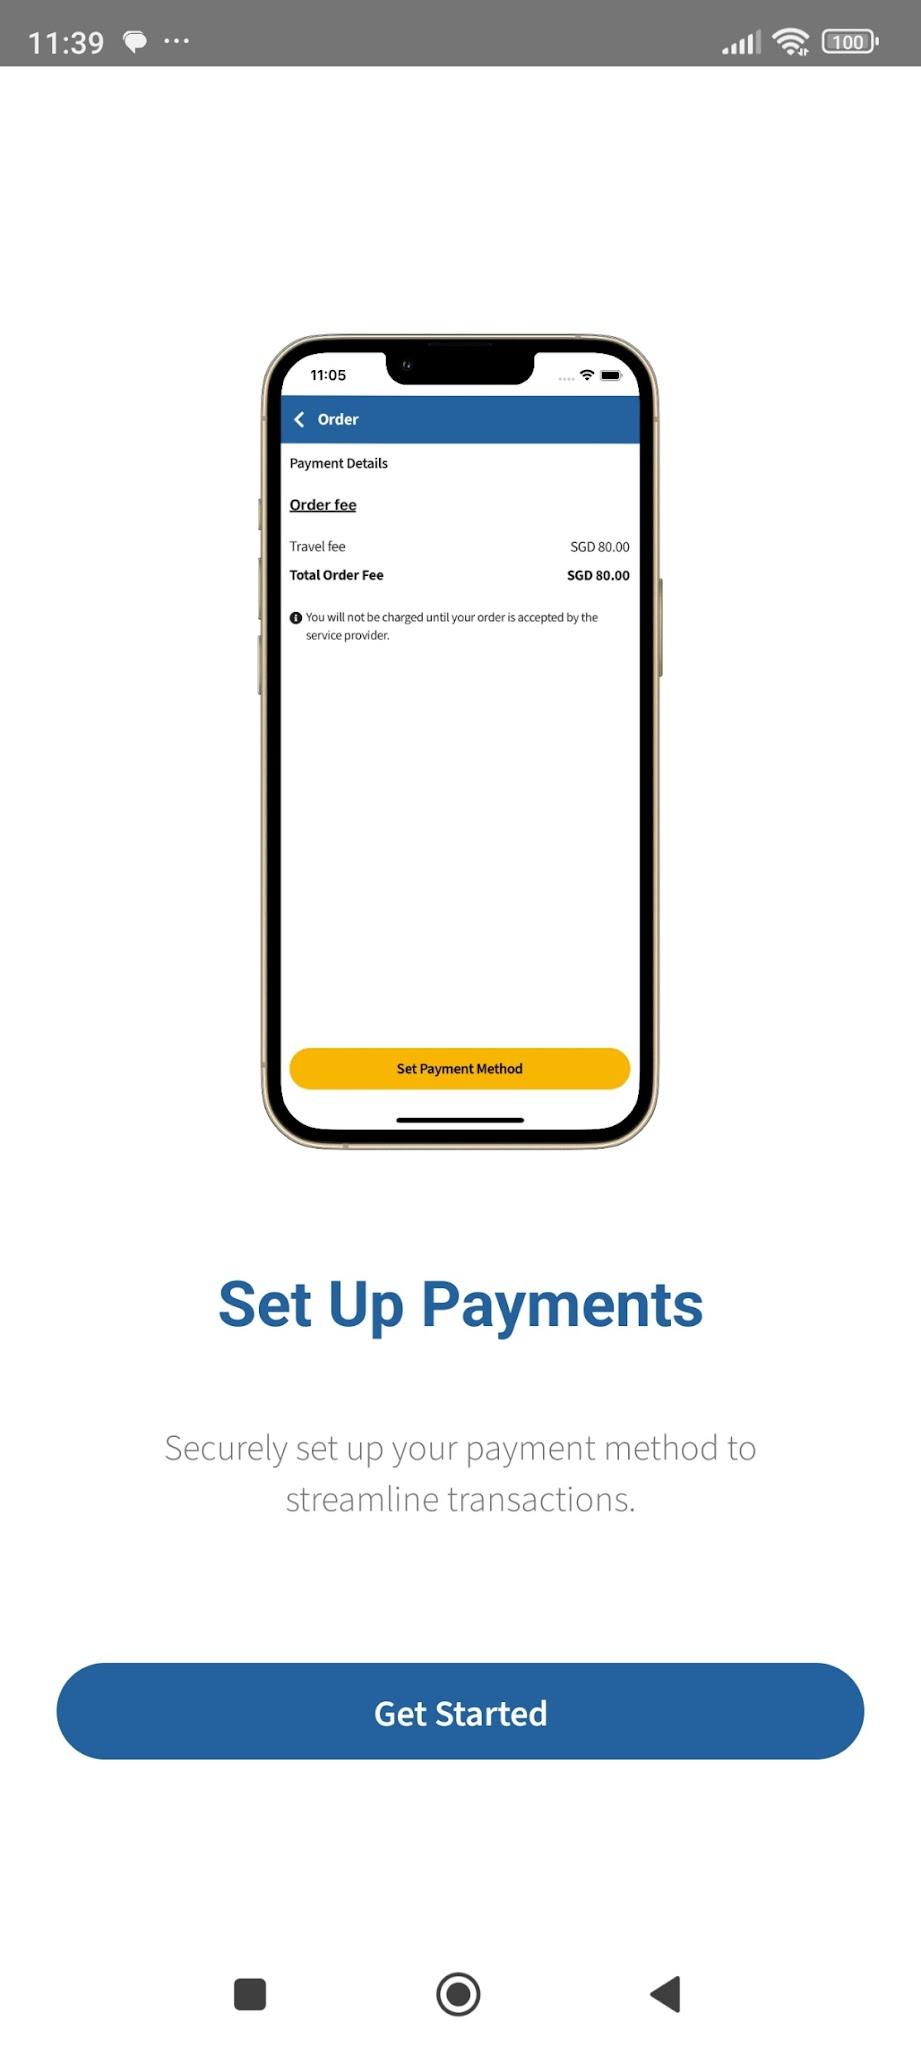
  1. There will then be 5 brief intro screens that you can scroll through or Skip. We recommend that you scroll through the brief intro to get a better understanding

  2. On the 5th brief intro screen, tap on Get Started


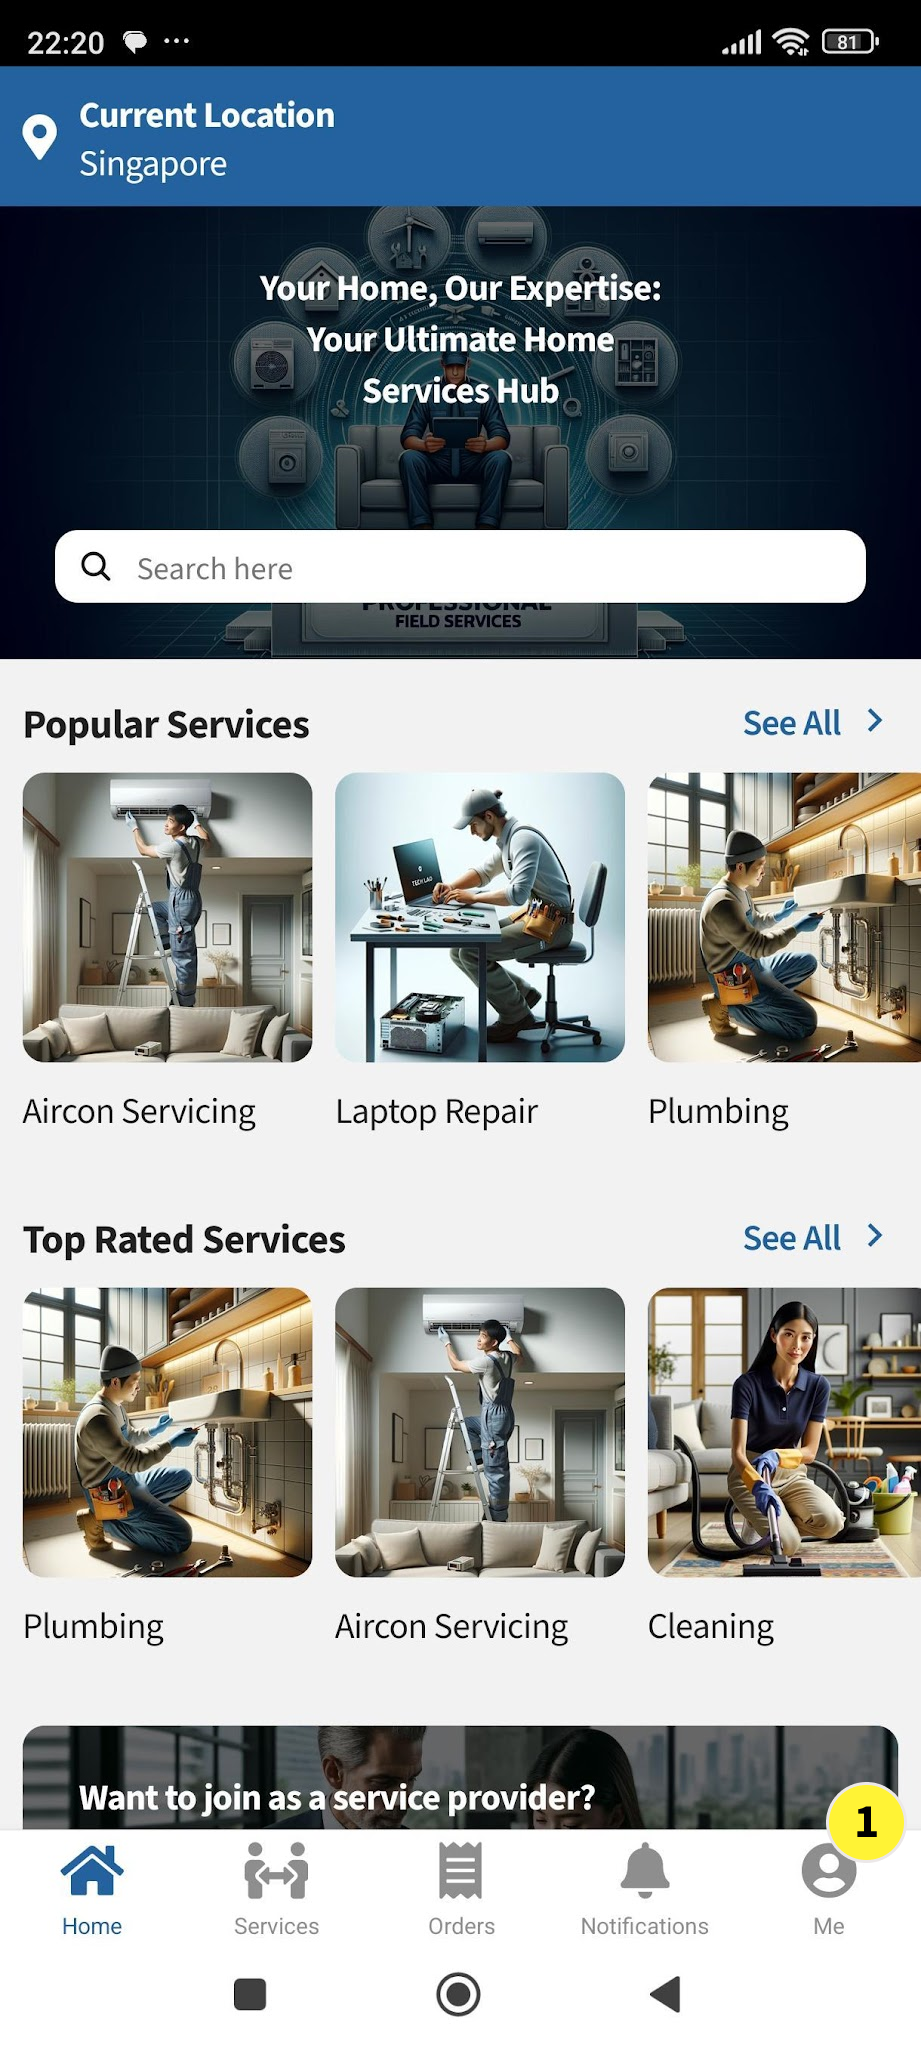
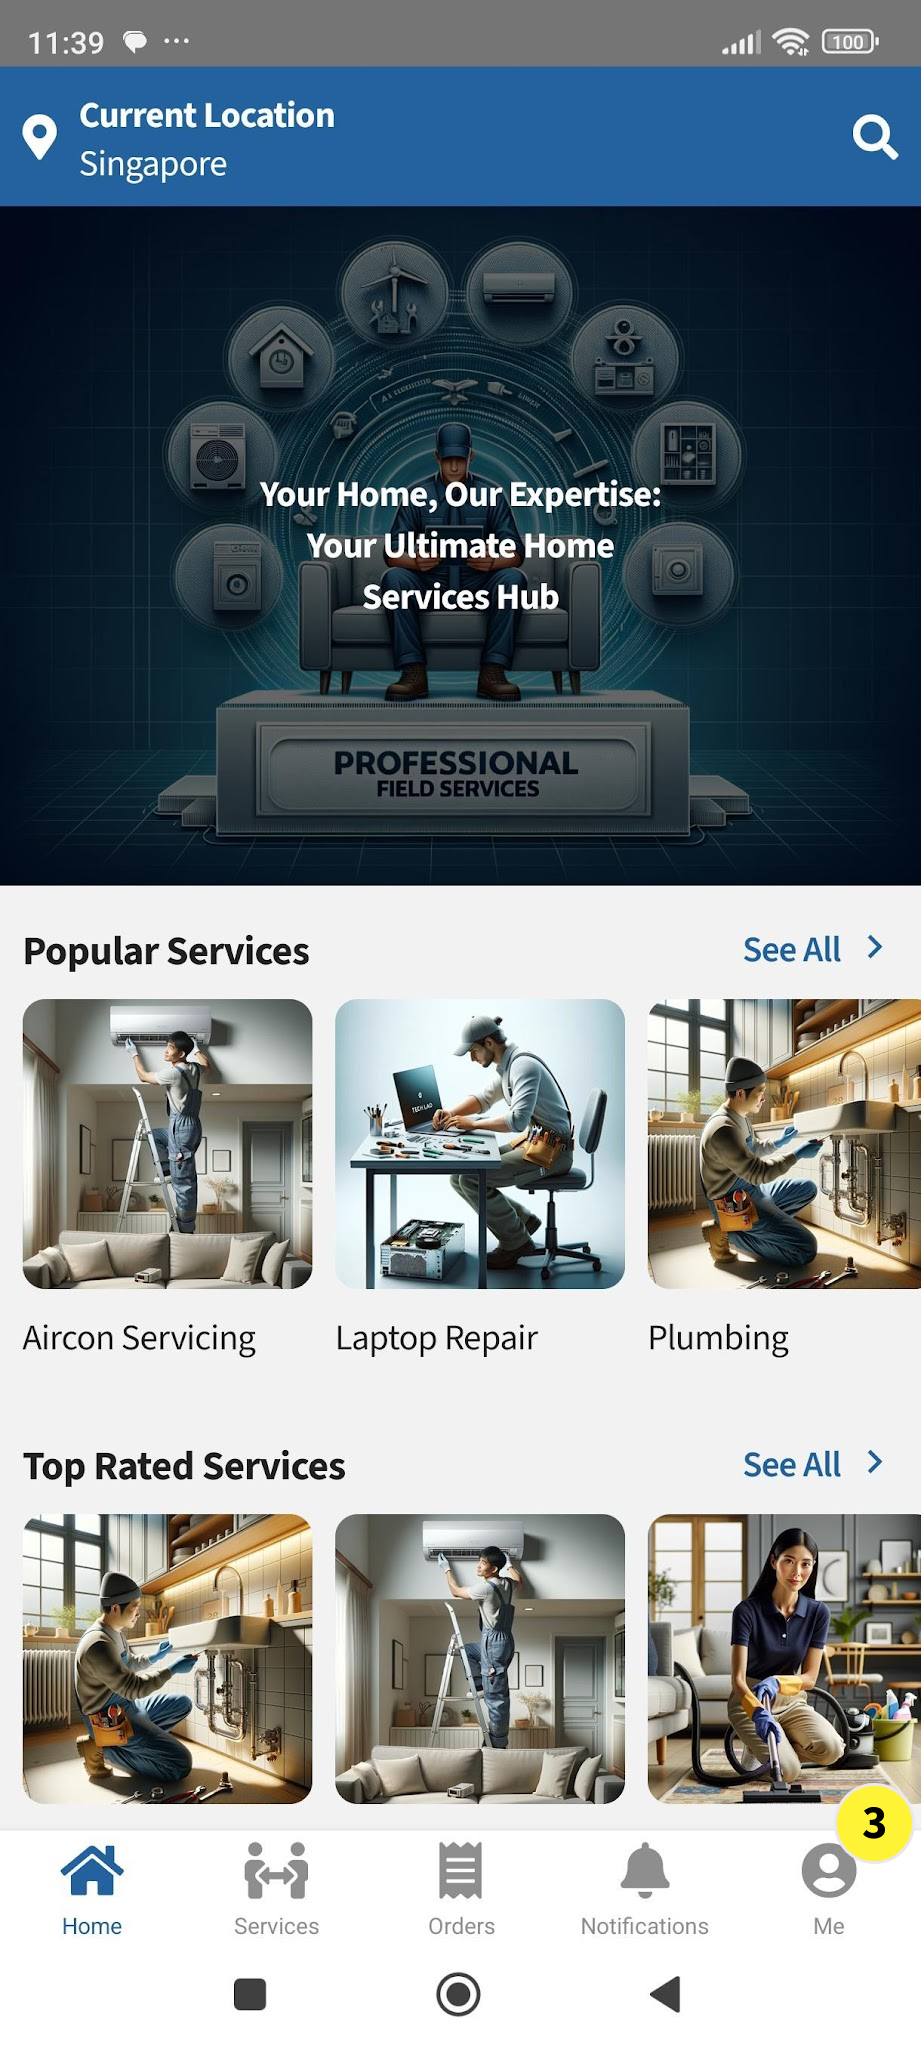
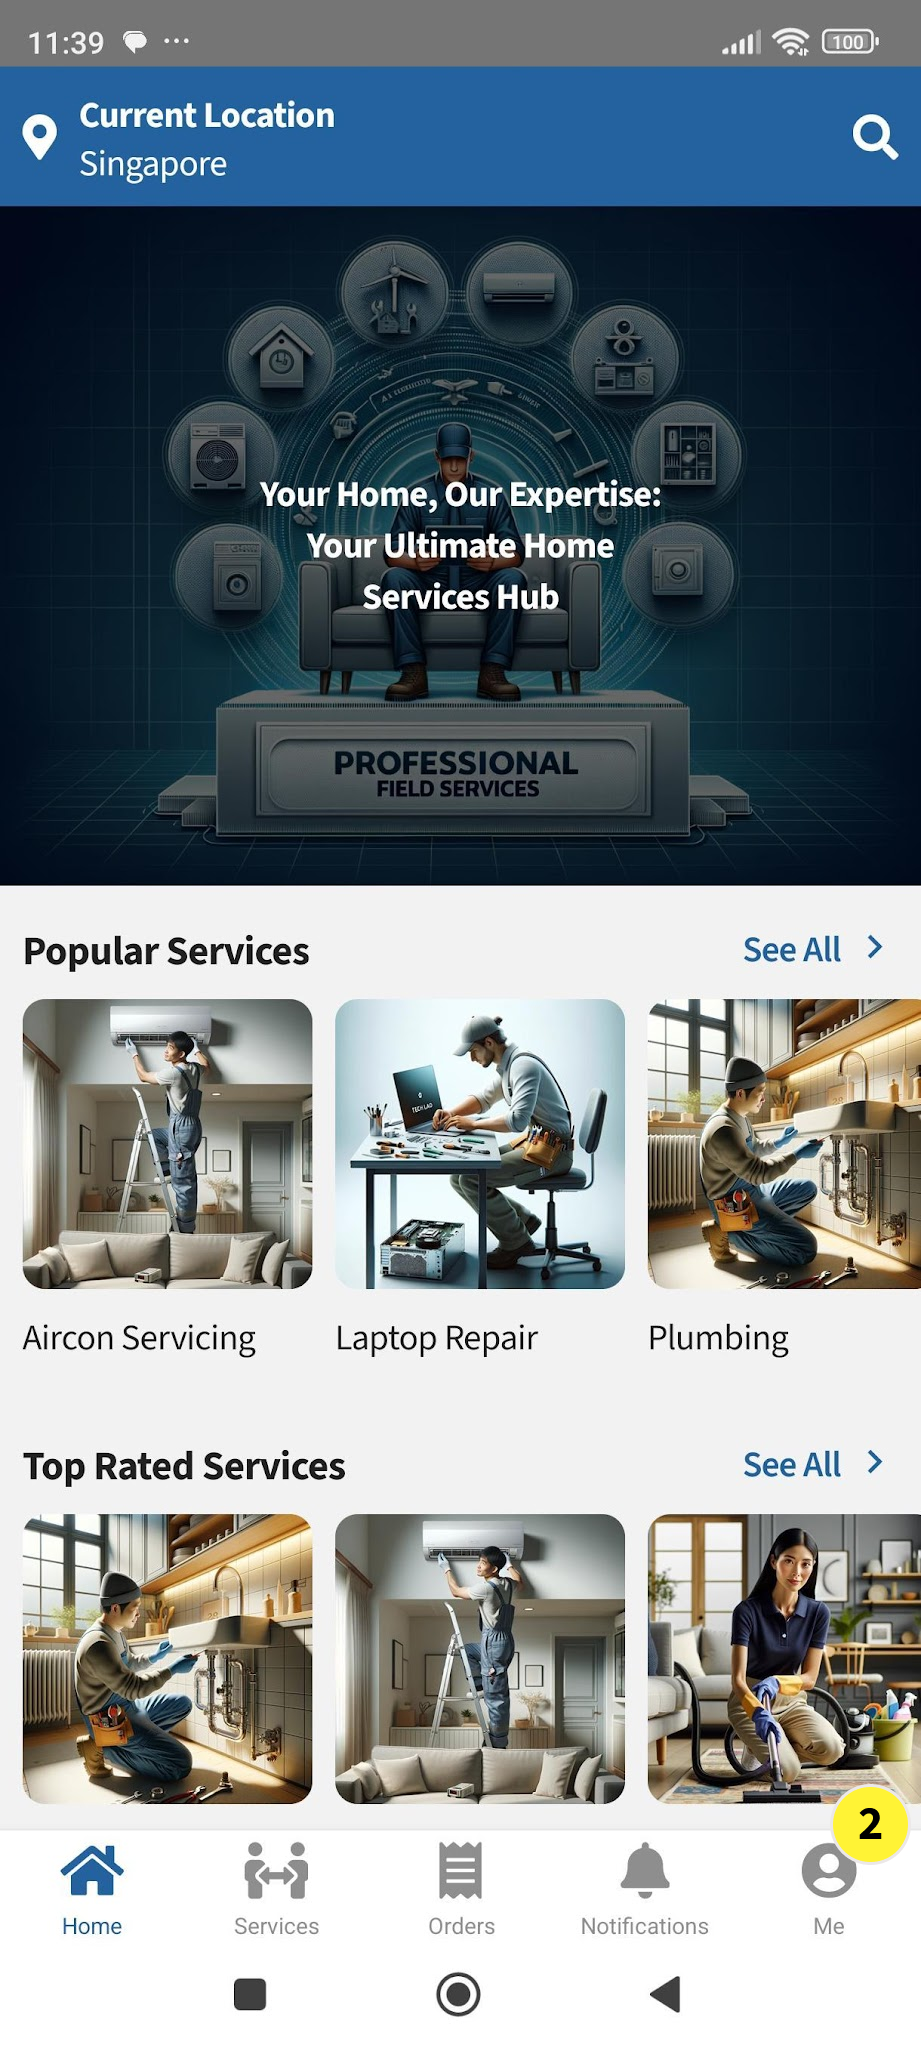
  1. After tapping on Get Started, you will come to the TechLao End User App Home Screen.

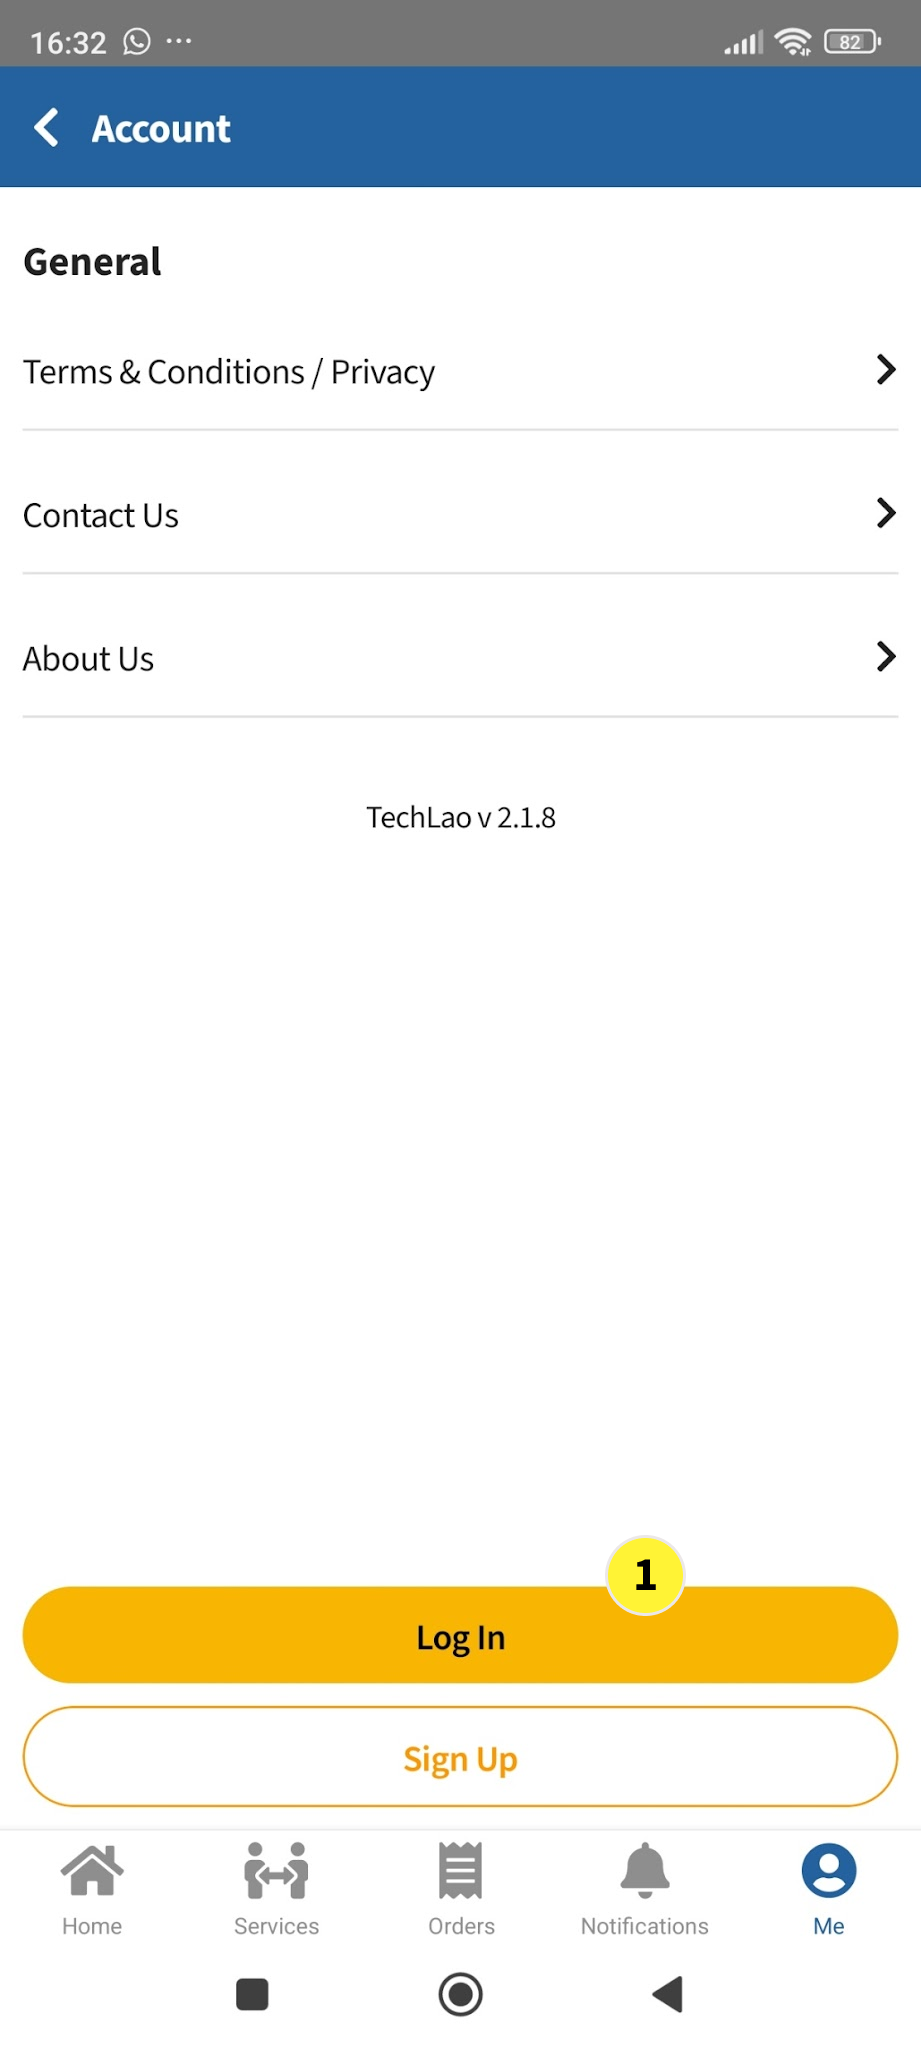
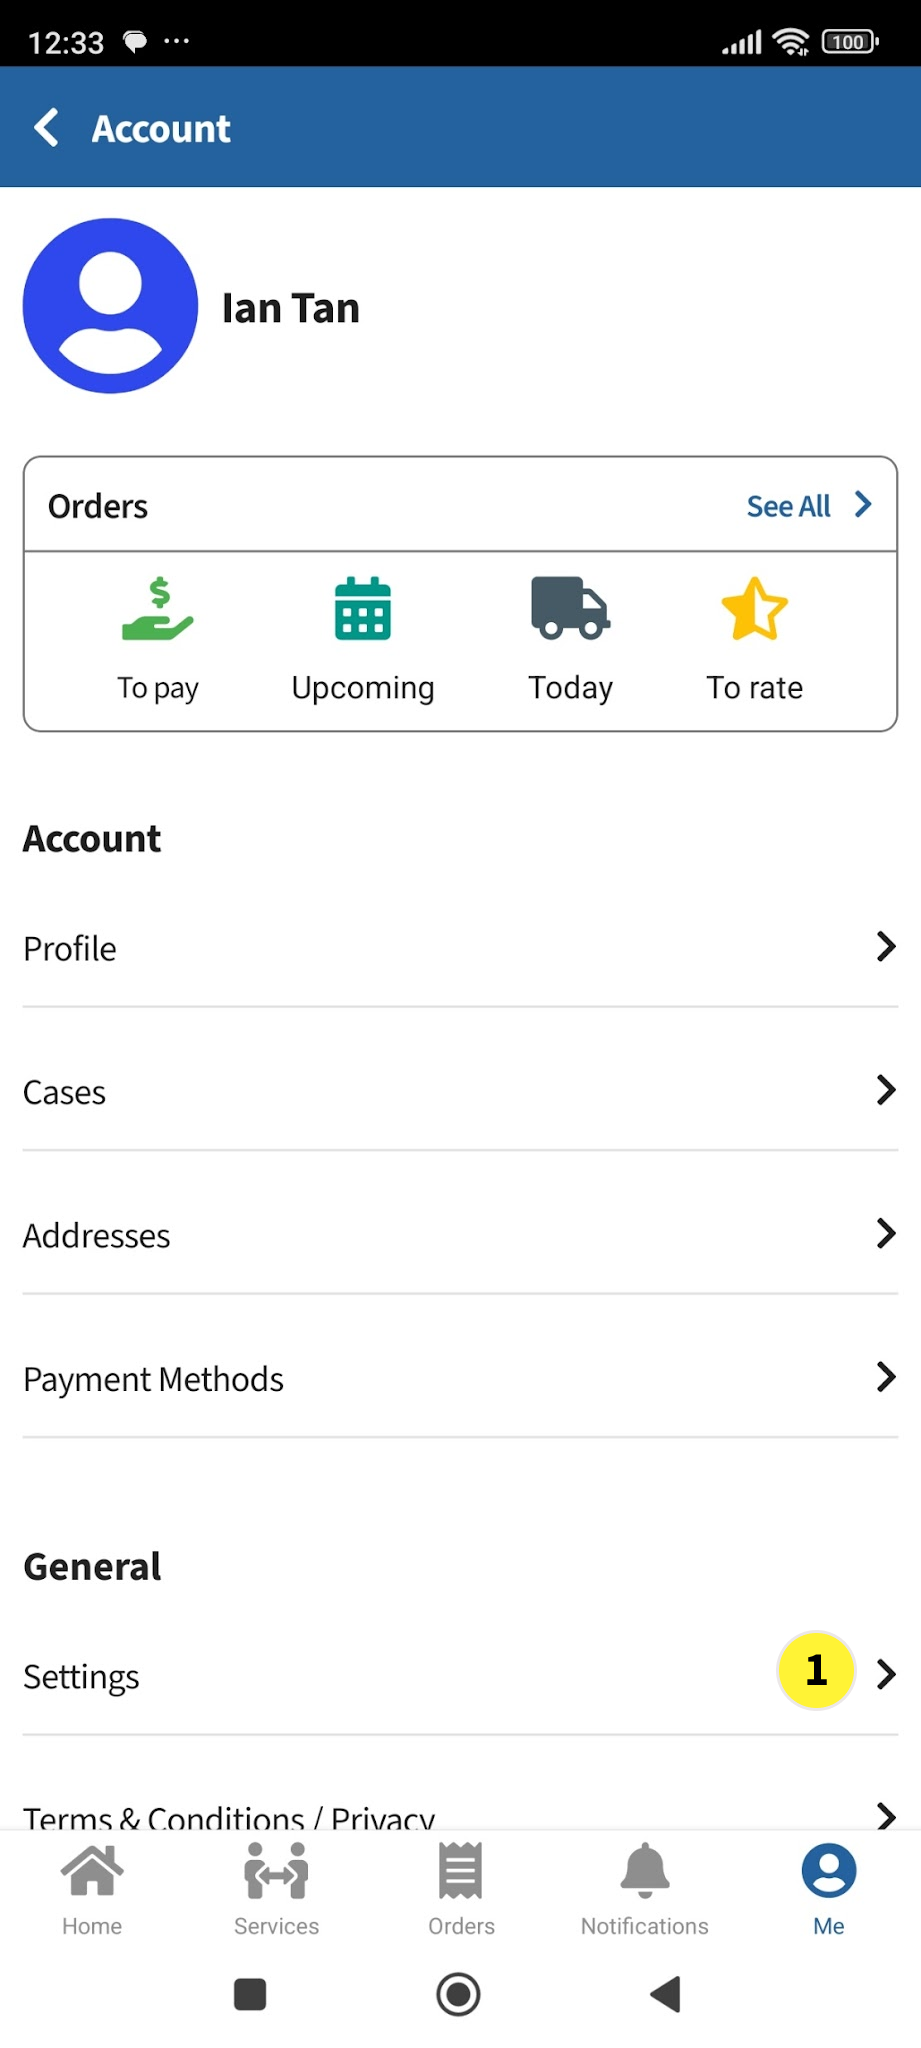
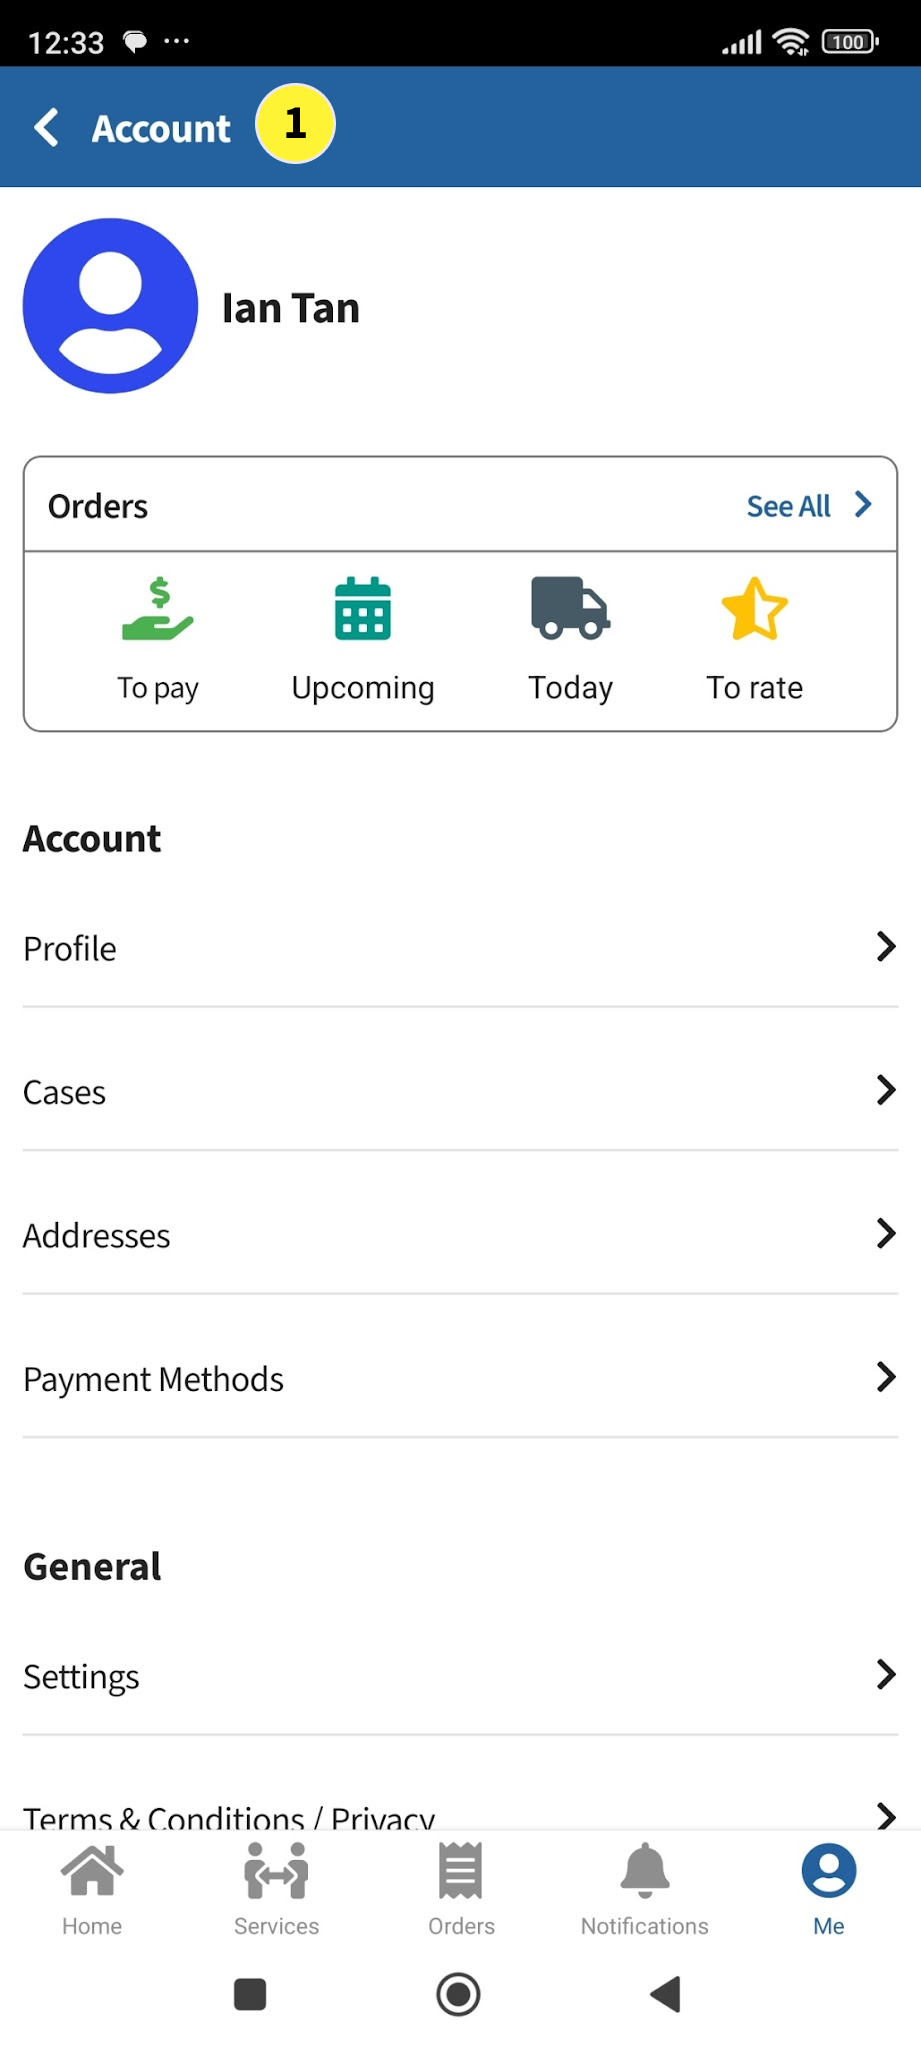
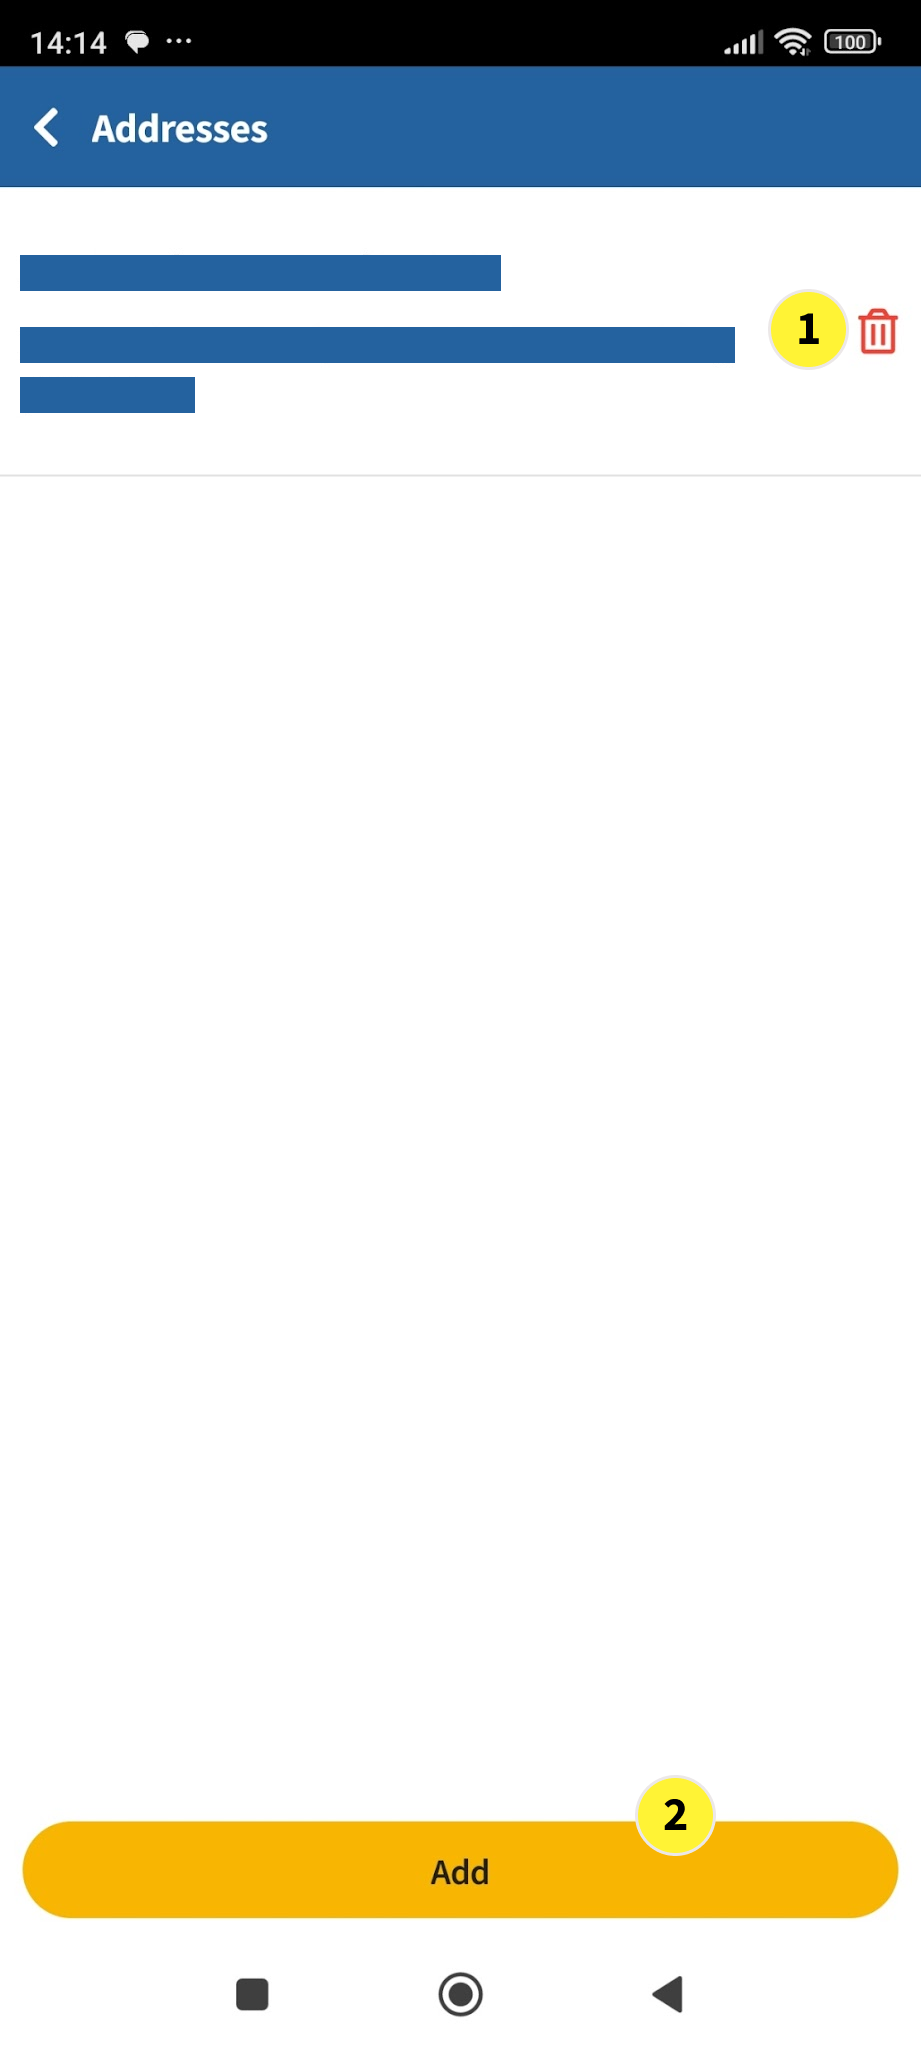
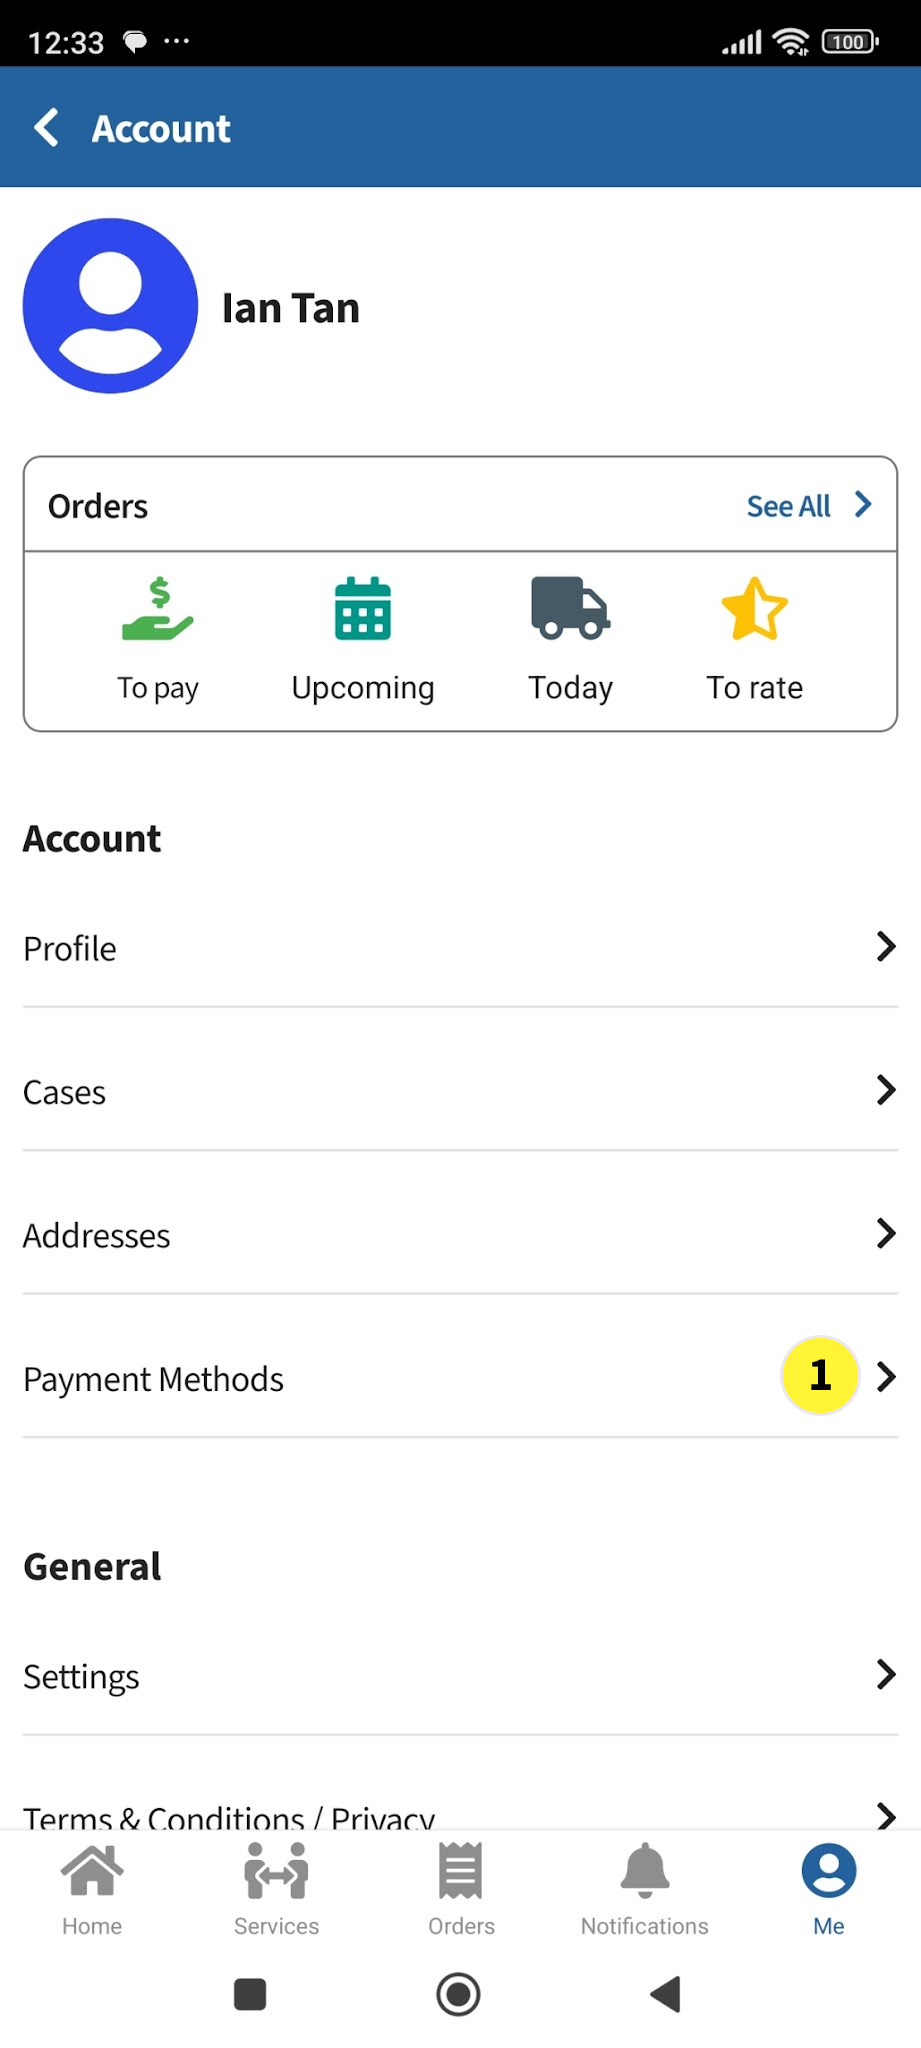
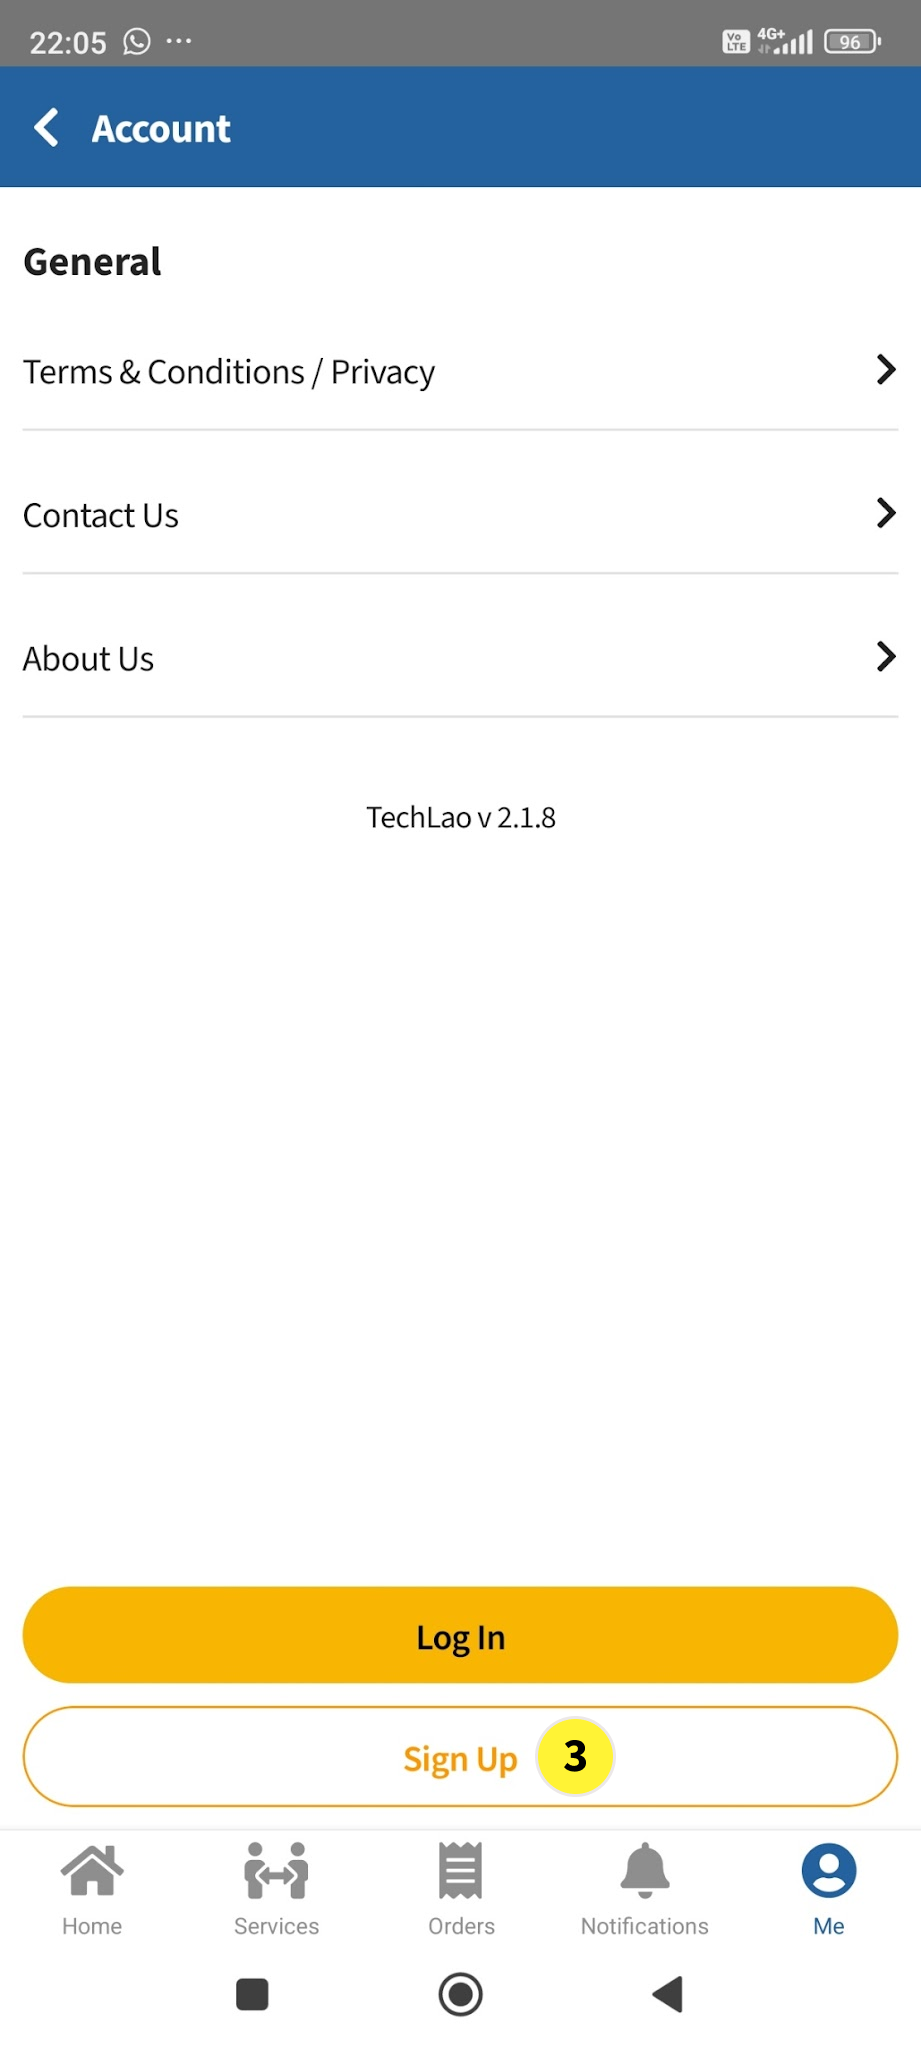
  2. You can proceed to setup your login account by tapping on Me

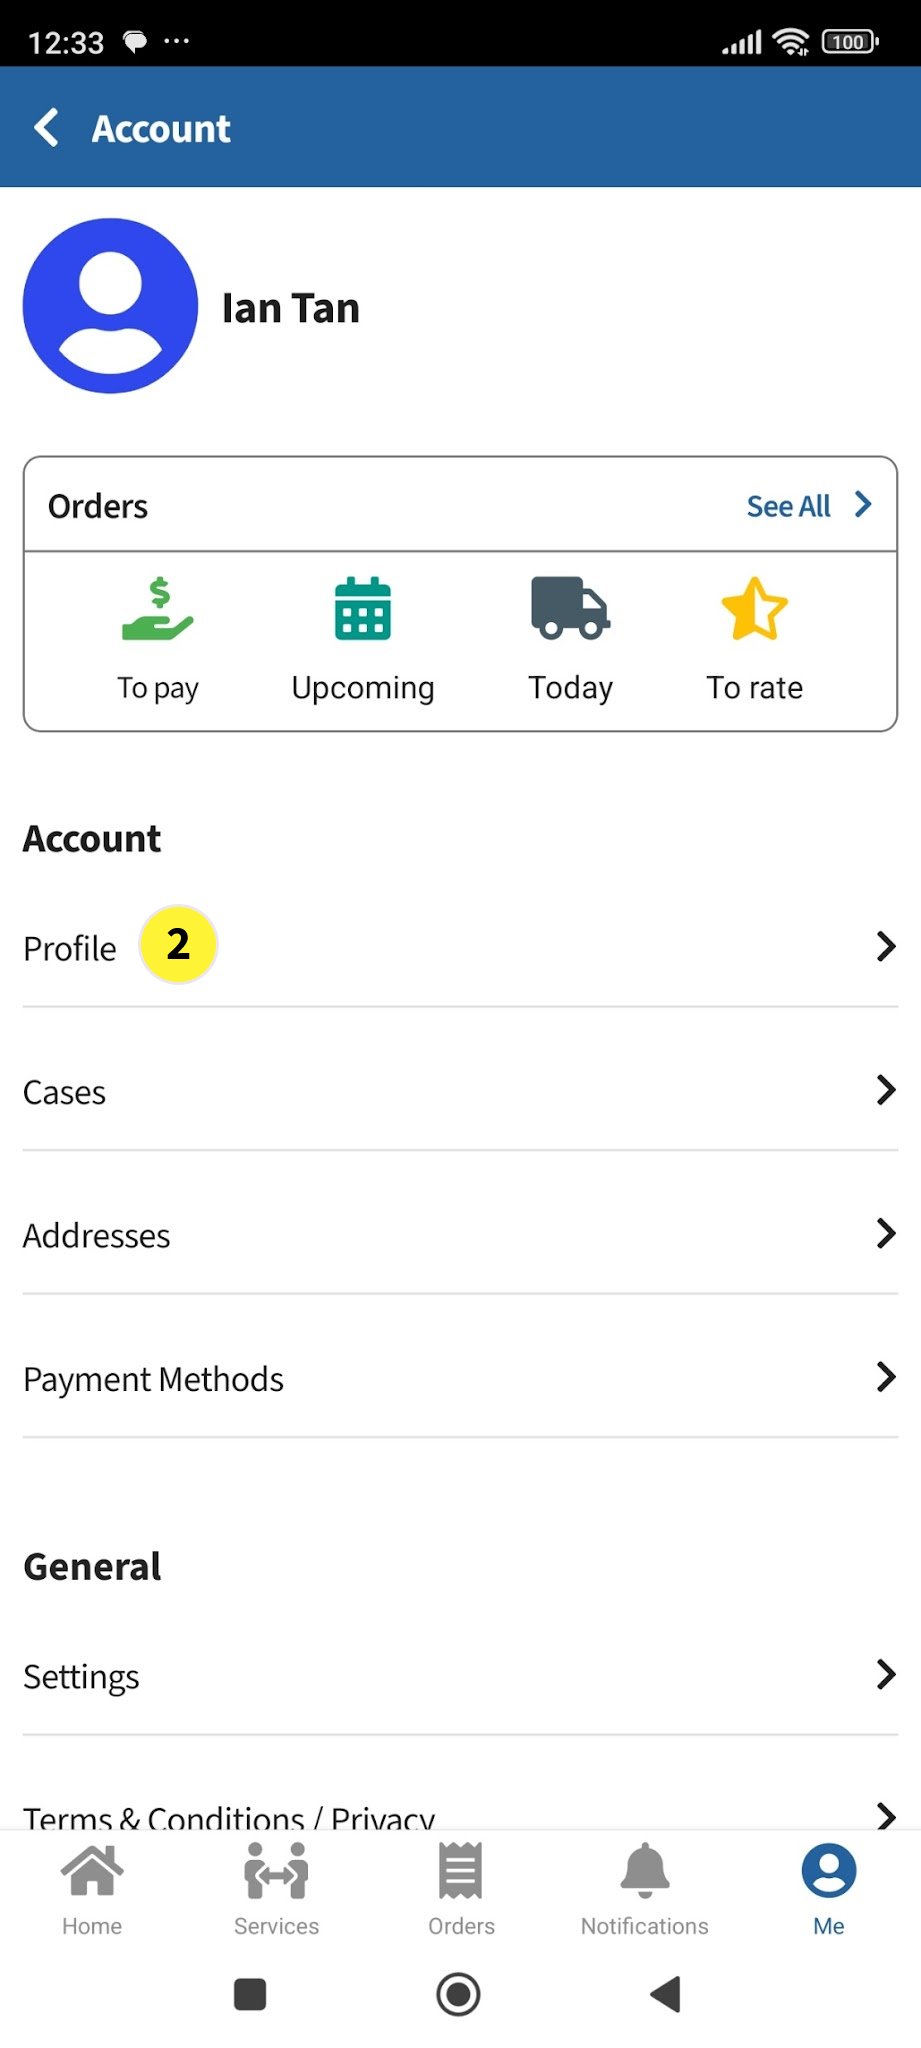
  3. After tapping on Me, on the next screen (Account screen), tap on Sign Up


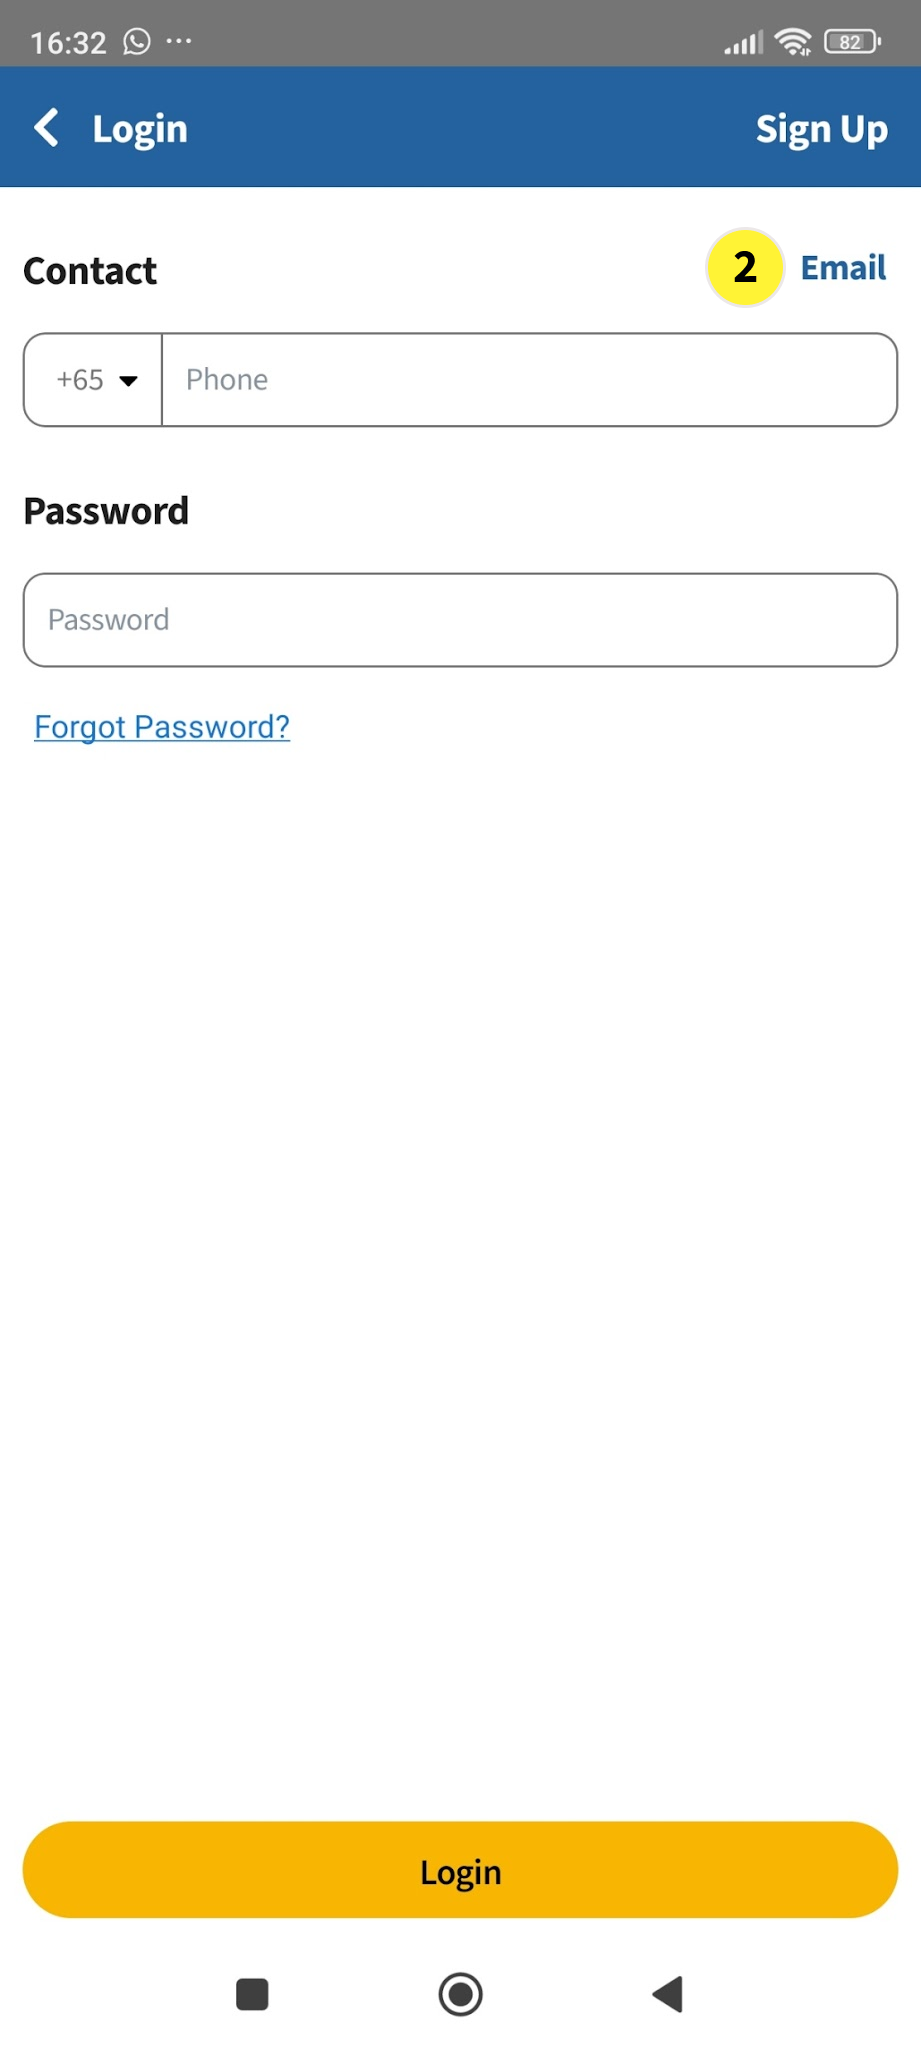
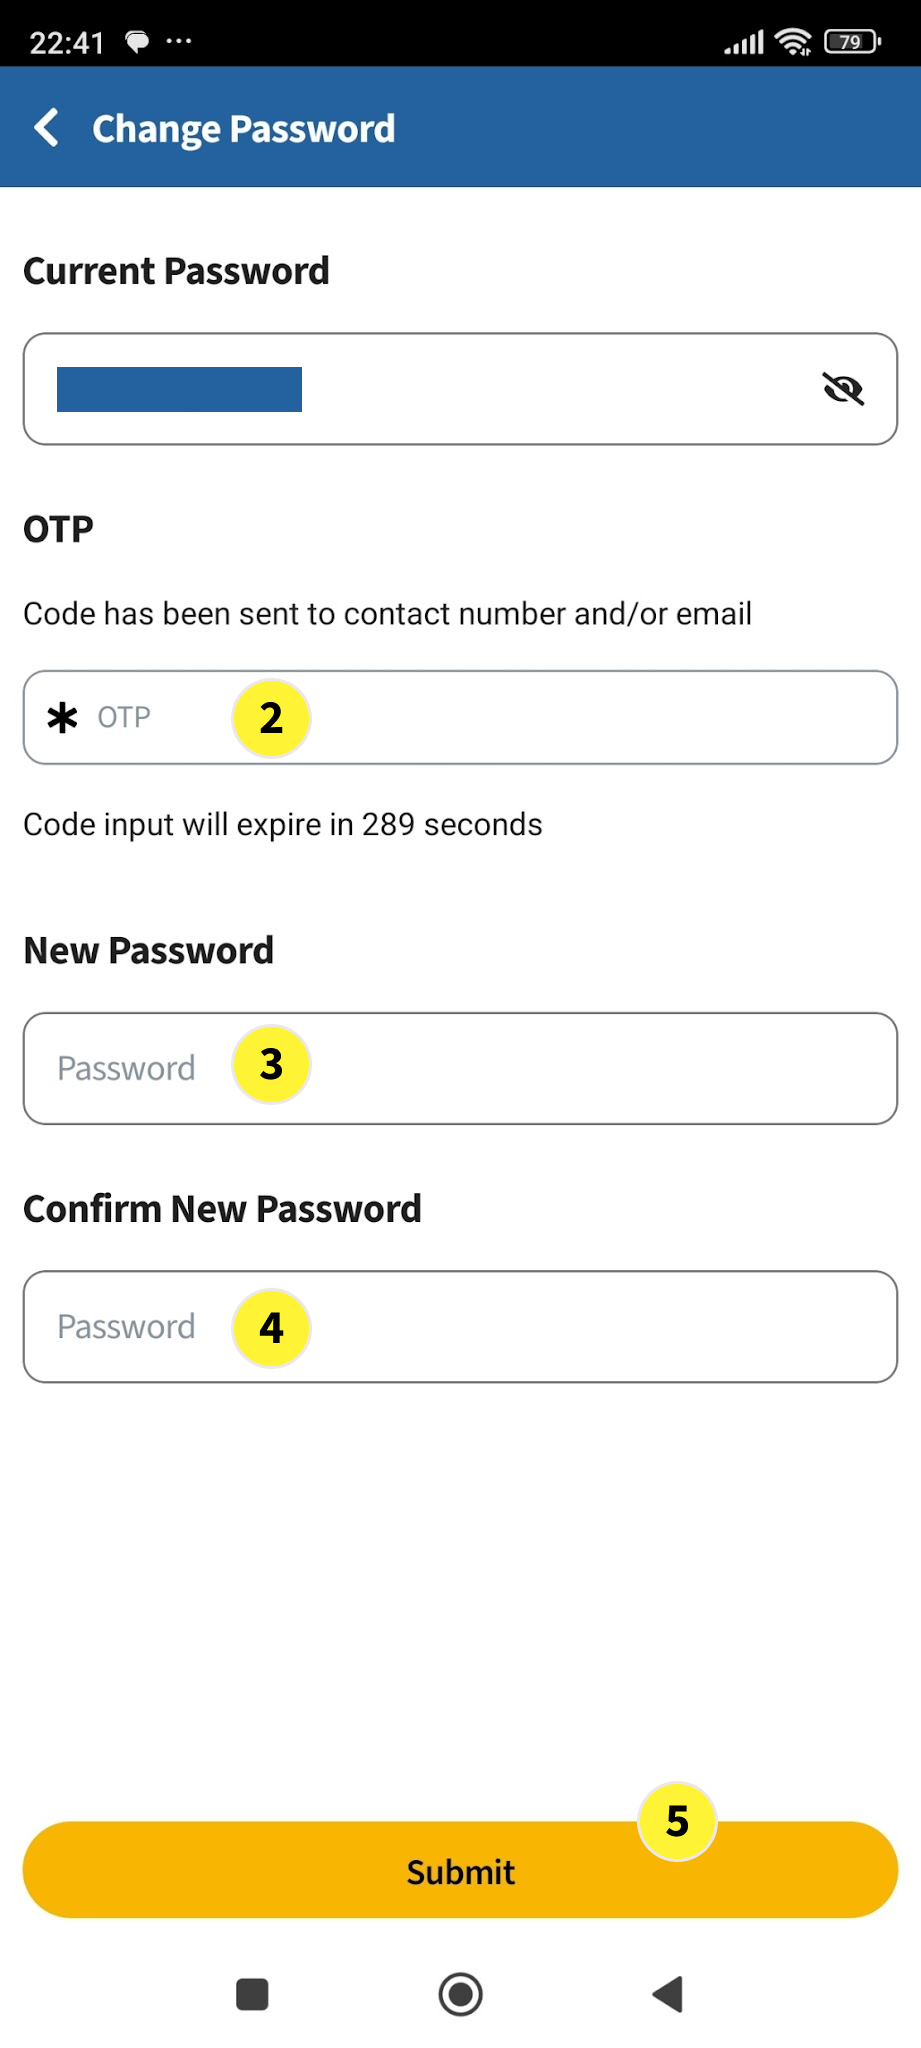
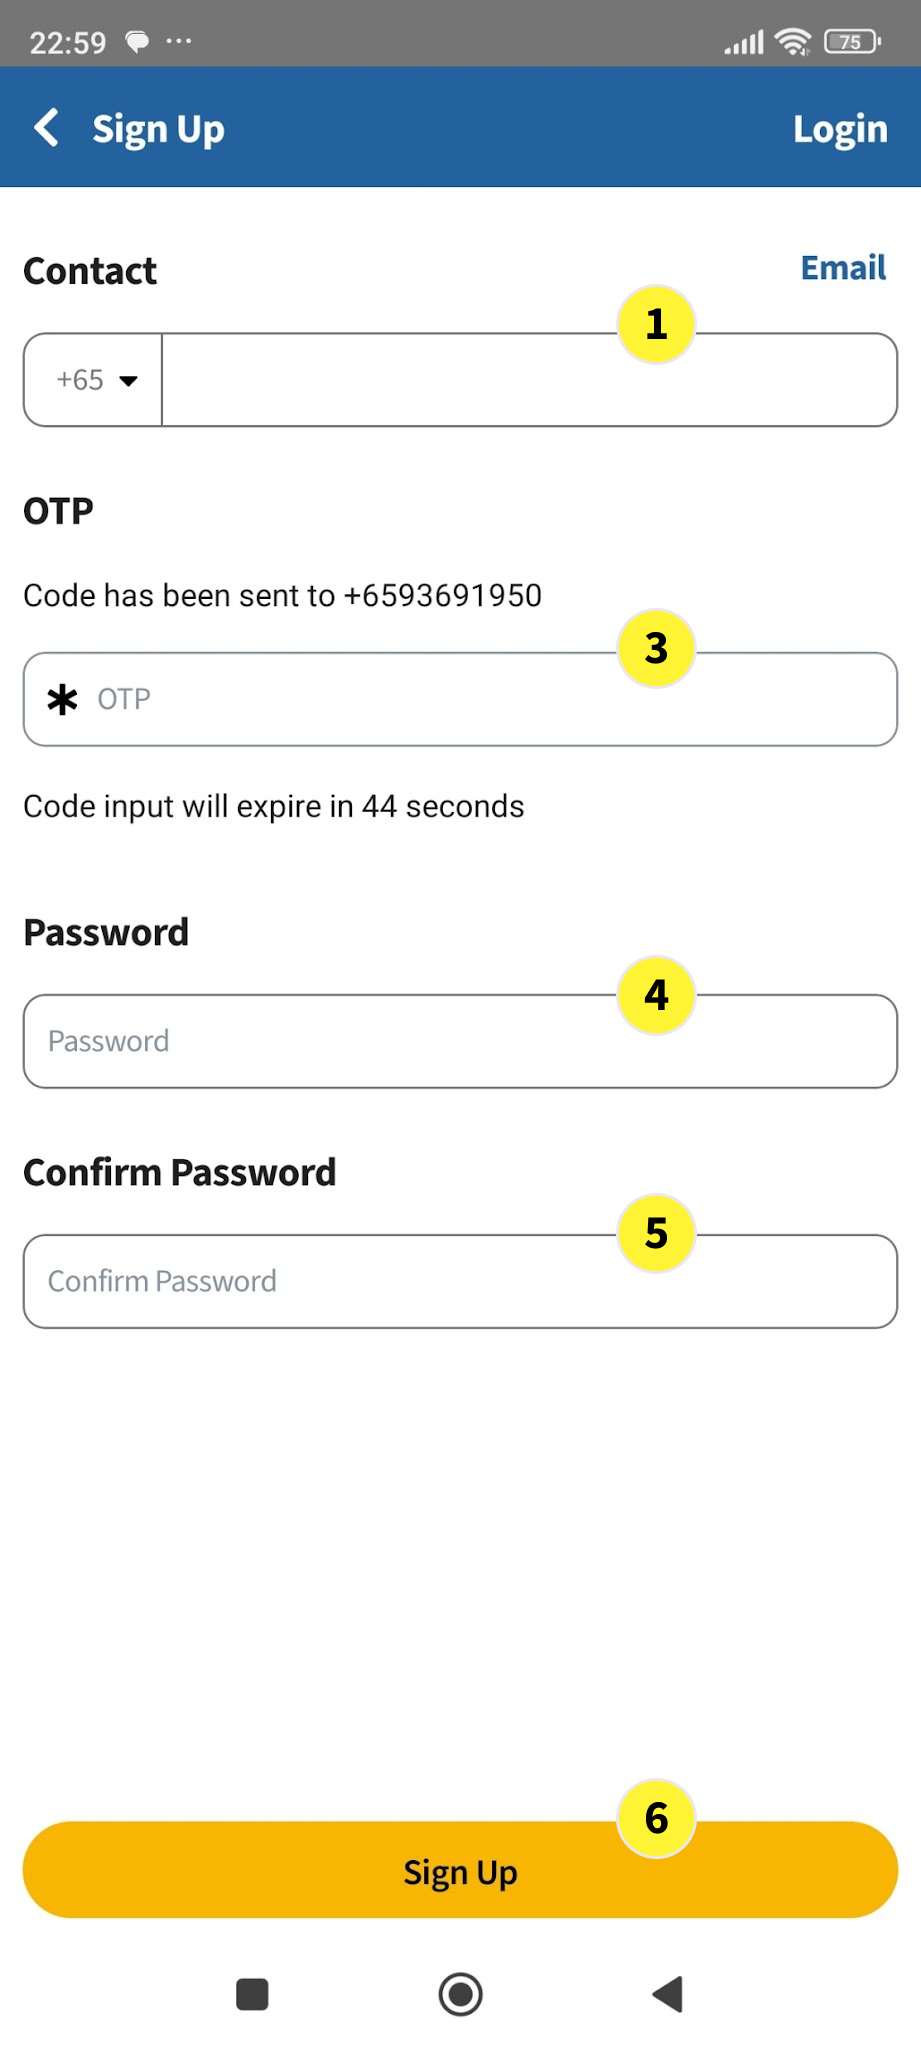
  1. In the next screen, input your mobile phone number.

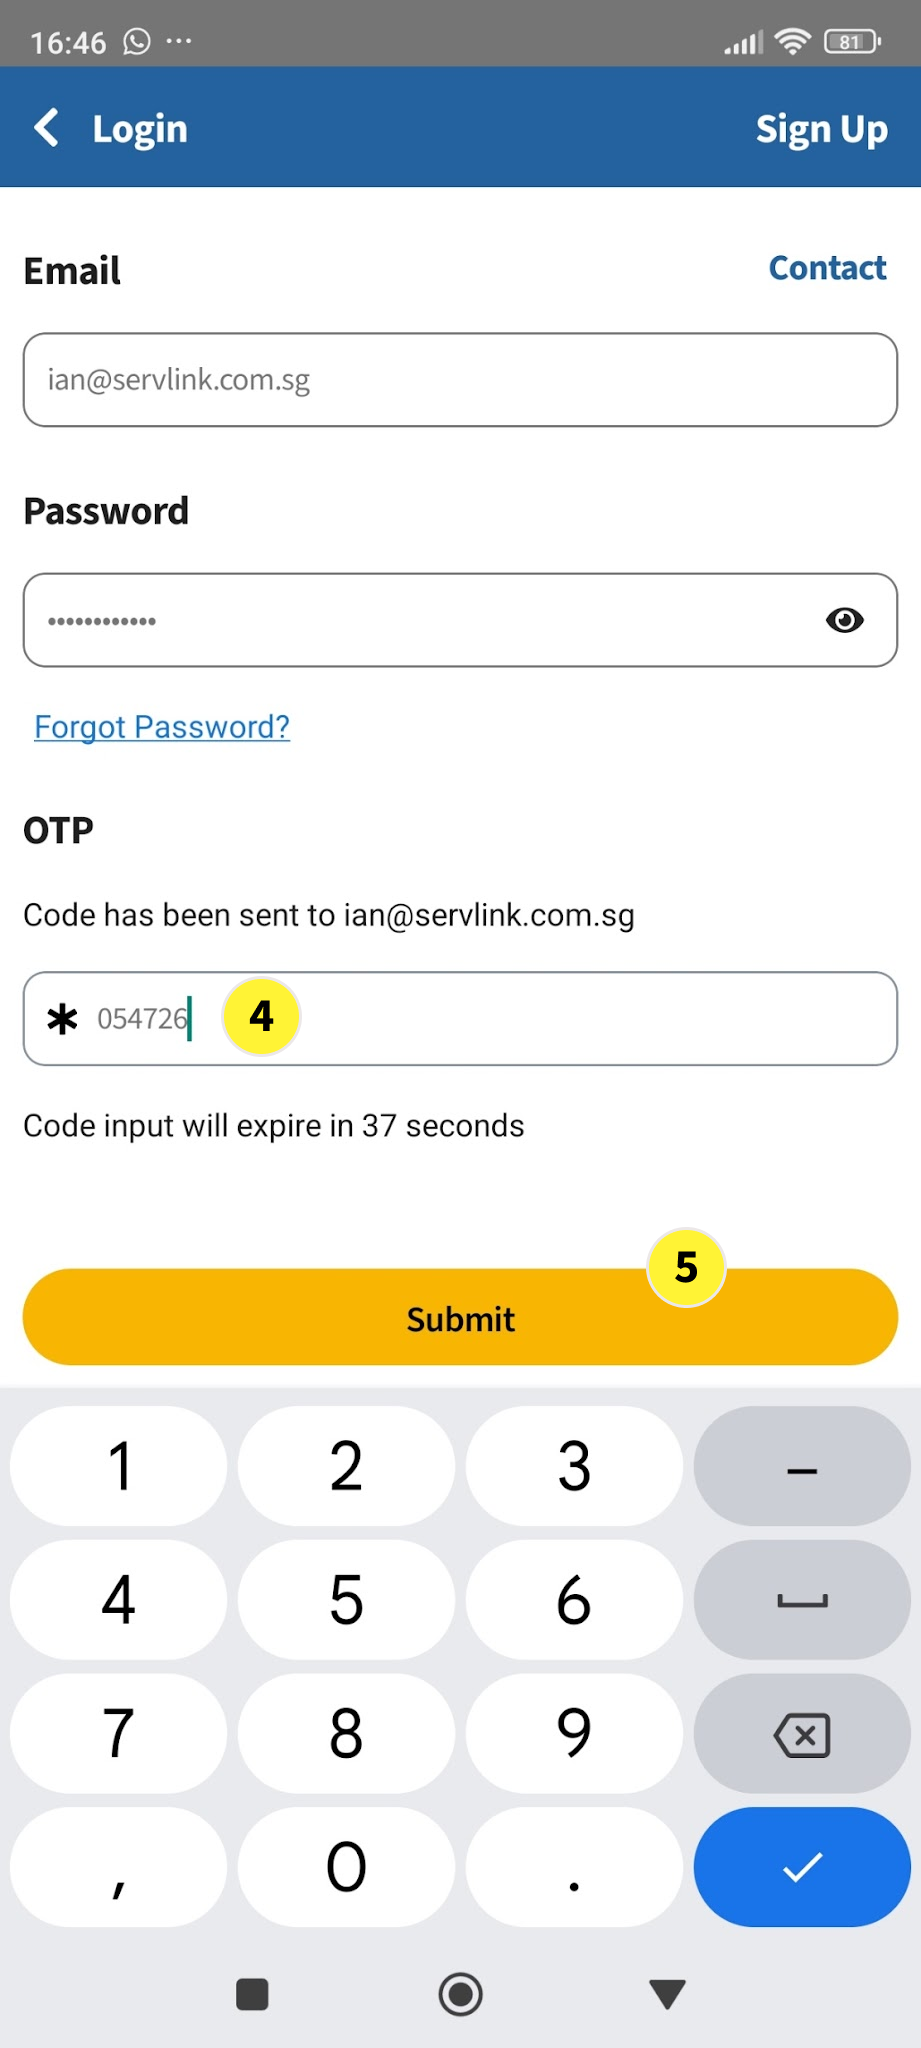
  2. An sms OTP will be sent to your mobile phone.

  3. Key in the OTP

  4. Create and type in a password. For good security, your password length should be at least 10 characters long with Capital Letters, Small Letter, Numbers and Special Characters.

  5. Retype your password under Confirm Password

  6. Tap on Sign Up

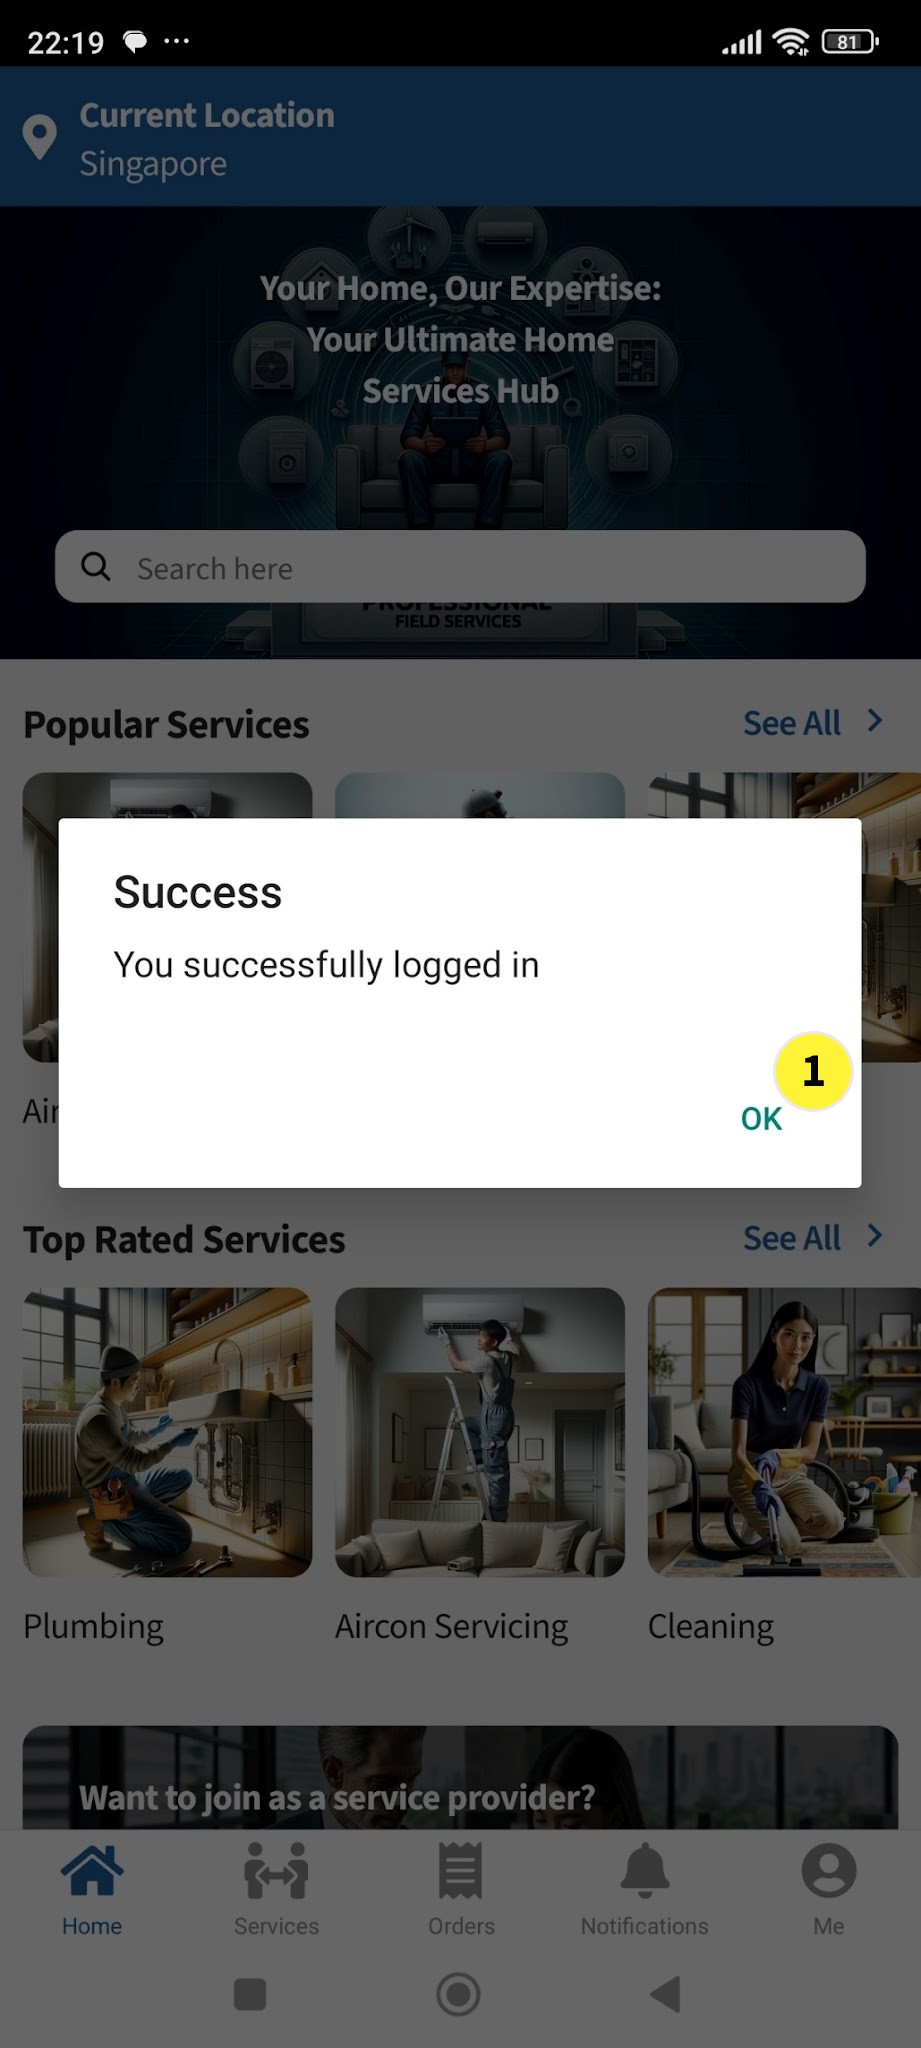
  7. If Sign Up is successful, in the next screen, you can login with your mobile and password


Part 2 - Profile and Account Management

After you login, you will see the Home Screen.

  1. Tap on ME ME icon 
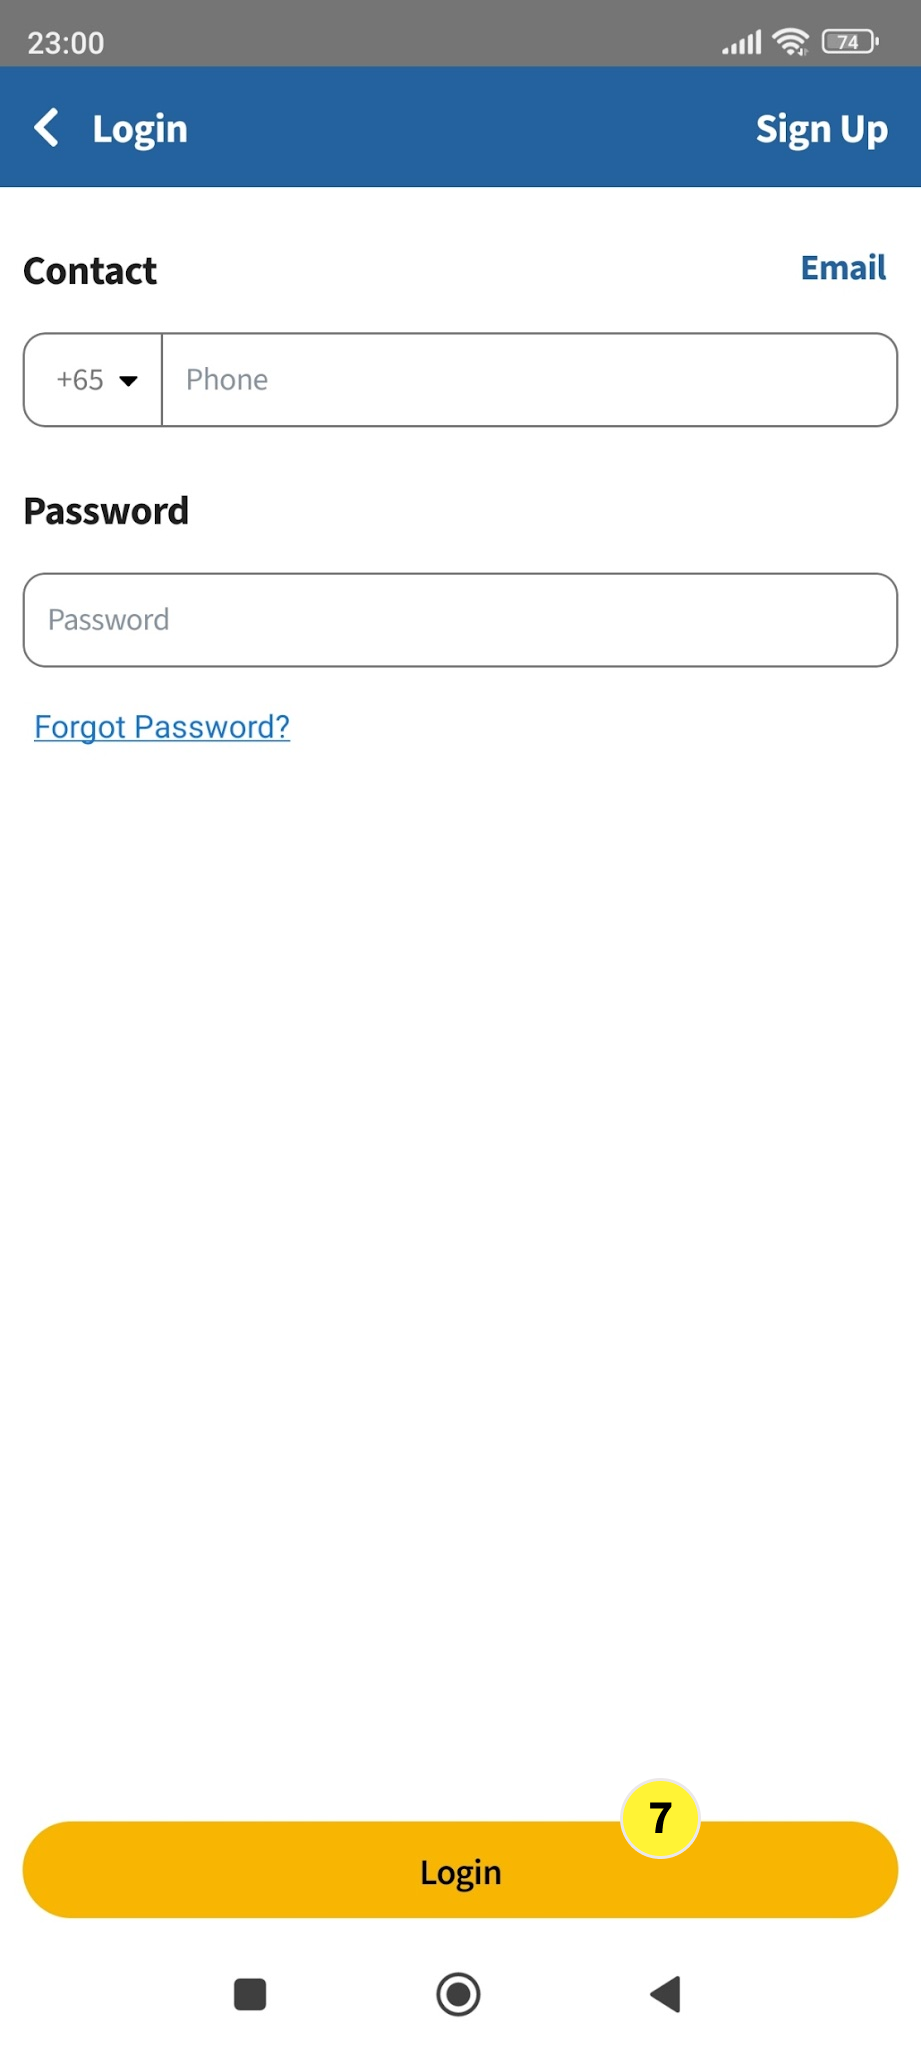
to go into the Account Screen.

    In the account screen, you can view or configure various items such as:

    • Account
      • Profile
      • Cases
      • Addresses
      • Payment Methods
    • General
      • Settings
      • Terms & Conditions/Privacy
      • Contact Us
      • About Us
  2. Tap on Profile to go to the Profile Screen.


  1. In the Profile Screen, you will see Name, Contact (i.e. your mobile#) and Email

  2. When you first install and setup the TechLao End User App, the system will ask you for your Name and Mobile Number but not your Email. Hence, the Email is shown as N/A.

  3. You can configure to use your Email to login to the TechLao End User App where the OTP will be sent to your Email during login. To do this, tap on Edit

  4. This will bring you to the Edit Profile Screen


  1. In the Email Setup screen, key in your Email and tap on Save.

  2. The TechLao End User App will then send you’re an OTP to your email address. Key in the OTP.

  3. The tap on Save again.

  4. Your email will then be setup in the TechLao End User App


  1. By going back to the Profile screen, you will then see that your Name, Contact and Email will all be registered and setup.

  2. You can then tap on Sign Out to test login in using your Email address.

  3. Once you have signed out, you will return to the Home Screen. To sign-in, tap on Me


  1. In the next screen, tap on Log in

  2. In the next screen, tap on Email


  1. Type in your Email Address

  2. Type in your Password

  3. Then tap on Login

  4. An OTP will be sent to your Email. Key in the OTP

  5. Tap on Submit


  1. A pop-up window saying that you have successfully logged in will show. Tap on OK

  2. You will then be at your Home Screen again after you have successfully login in using your email address

  3. Tap on Me to go to the Account Screen again


  1. In the Account Screen Tap on Settings

  2. In the Settings Screen, under Account Settings, you can:

  3. Change Password (i.e. Change your login password)
  4. Delete Account (i.e. delete your TechLao Login Account)

  1. To change your login password, tap on Change Password

    An OTP will be sent via sms to your TechLao account registered mobile phone

  2. Key in the OTP

  3. Key in a new Password

  4. Confirm the new Password

  5. Tab on Submit


  1. A pop-up box that says Password Updated! will show. Tap on ALL SET!

  2. To Delete your TechLao End User Account, you can tap on Delete Account**

    ** When your TechLao User Account is deleted, all your previous bookings and orders will no longer be retrievable. This will be the case even if you re-create your User Account with the same Mobile Number and Email


  1. In the Delete Account screen, key in your password. Then follow the instructions on the screen to delete your account

  2. Then tap on Delete**

    ** Take note that when you have deleted your TechLao End User Account, all your previous bookings and orders will no longer be retrievable. This will be the case even if you subsequently re-create your User Account with the same Mobile Number and/or Email


Part 3 - Address Management

  1. Tap on < to return to the Settings Screen

  2. Tap on < to return to the Account Screen


  1. In the Account Screen, you can tap on Addresses to setup location address. More than one location addresses can be setup (e.g. Home, Office).

  2. In the Addresses Screen, if you have not setup any location address, it will show No Address Yet

  3. Tap on Add to add your location address.


In the Add an Address Screen….

  1. Give a Name to your location address (e.g. Home)

  2. Select the Country (e.g. Singapore)

  3. Enter the location address This is the location where you want the service to be performed (e.g. your home address)

  4. You can set this address as the default location address by turning it on

  5. Tap on Save

  6. The address you have just created will show here.

  7. The Address Created pop-up box will show. Tab on OK


  1. The location address you have created will show here. You can delete this address any time by tapping on the Trash icon.
    If you delete your location address, you will be required to create it again when you do a service booking.

  2. You can create additional location addresses where you want the service to be performed (e.g. your office address). Tap on Add to add more location address

  3. If you do not need to create any additional location address, tab on < to go back to the Home screen


  1. In the Home Screen, the Default Location Address you have setup will show in this blue area. You can also tap in this blue area to manage (i.e. Add or Delete) location addresses you have created.

  2. Next, you can Tap on ME to go back to the Account Screen for your Payment Methods configuration


Part 4 - Payment Methods

  1. In the Account screen, tap on Payment Methods to setup your credit card info.

  2. In the Payment Methods screen, it will show No payment method linked to your account. This is because there is no credit card set up yet.

  3. Tap on Add


  1. In the STRIPE payment gateway pop-up, key in your credit card information and tap on Set up. Follow the instruction on the screen to complete the credit card setup. For safety reason, we recommend you use a credit card with a low credit limit set

  2. When setup is completed, a pop-up window will tell you your card payment method is successfully set up for future payment. Tap on OK


  1. After tapping on OK, the pop-up window will close. And back at the Payment Methods screen, you can see the last 4 digit of your credit card number and credit card type.

  2. You can tap on this area and go into the next screen for credit card administration.

  3. In the next screen, you can see your card details. Only the last 4 digis of your credit card will show.

  4. You can tap on Remove to remove your credit card anytime. But for the next payment, you will need to setup the credit card again.

  5. You can add more credit cards if you like. But for safety reason, we recommend that you setup just one credit card.


  1. After you have setup your Credit Card in Payment Methods, you can tap on < to go back to the Account screen.